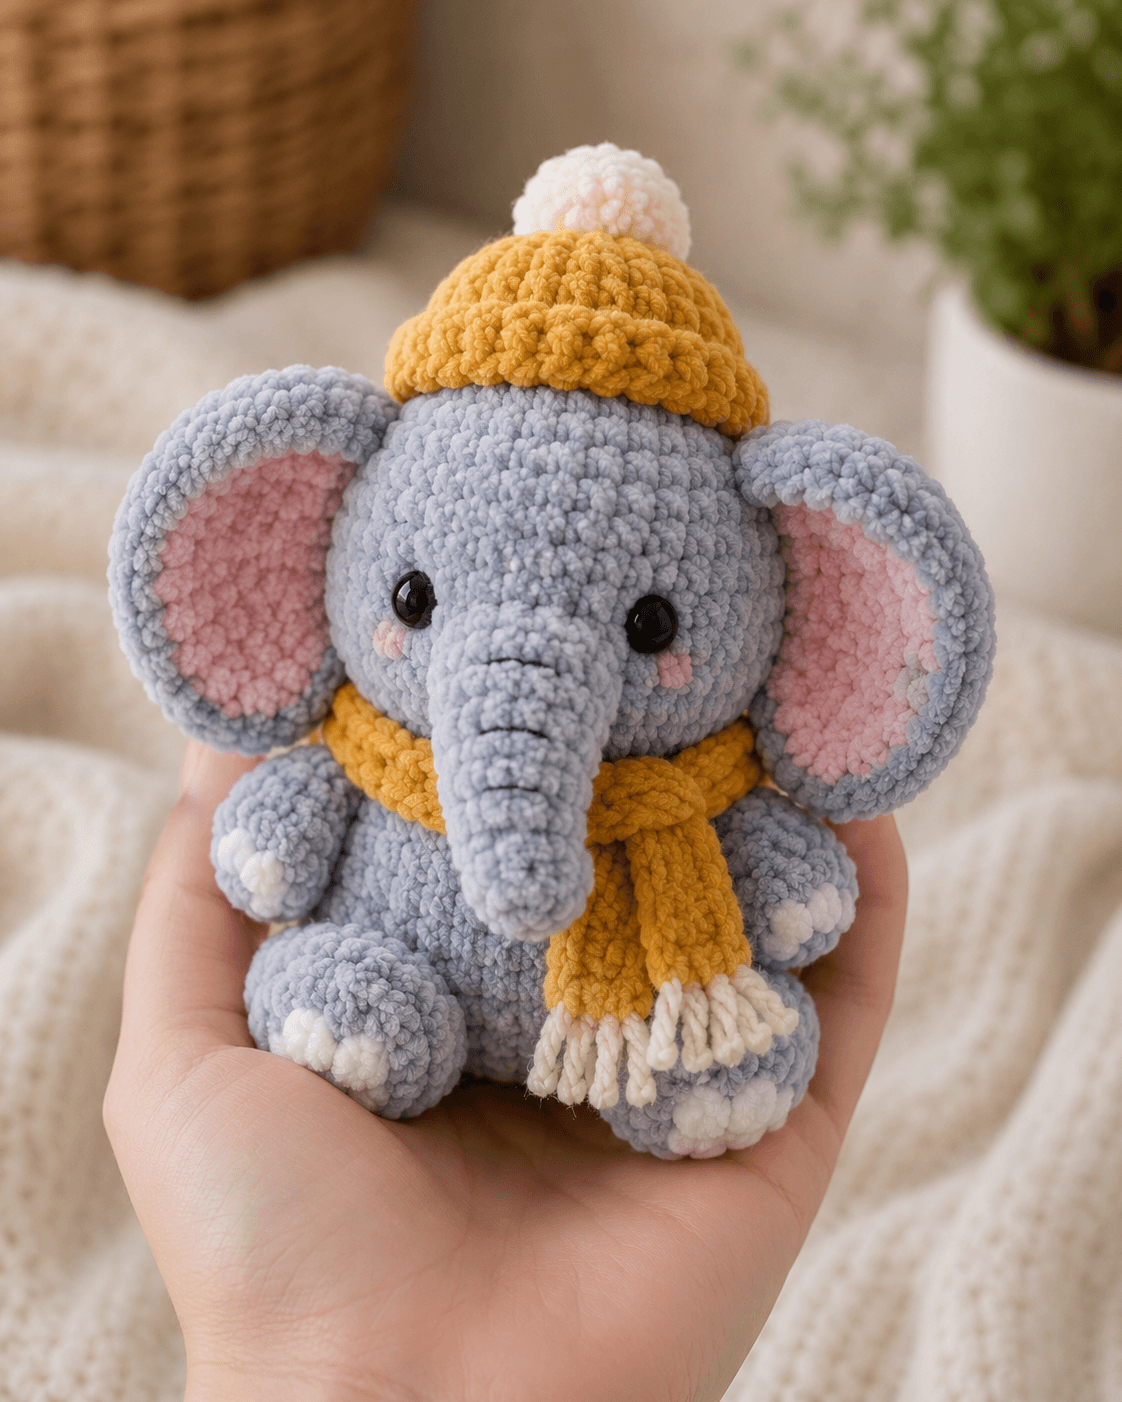
Materials
- Yarn — soft gray-blue plush yarn for head, body, trunk, arms, legs, and outer ears
- Yarn — light pink plush yarn for inner ears and blush accents
- Yarn — mustard yellow for beanie and scarf
- Yarn — white for pom-pom, toe details, and scarf fringe
- Embroidery yarn — black or dark gray for trunk lines and mouth detail
- Safety eyes 10–12 mm
- Polyester stuffing
- Crochet hook 3.5–5.0 mm depending on yarn thickness
- Yarn needle
- Scissors
- Stitch marker
Abbreviations
- MR — magic ring
- sc — single crochet
- inc — increase
- dec — invisible decrease
- sl st — slip stitch
- ch — chain
- hdc — half double crochet
- BLO — back loop only
- st — stitch
Notes
- Work in continuous rounds unless stated otherwise.
- The trunk is worked separately and sewn to the front of the head.
- Stuff the head firmly and the limbs lightly to medium.
- The hat and scarf are removable in concept, but can be tacked in place for display.
- Counts are shown in parentheses at the end of each round.
1. Head
R1: 6 sc in MR (6)
R2: inc around (12)
R3: (sc, inc) x 6 (18)
R4: (2 sc, inc) x 6 (24)
R5: (3 sc, inc) x 6 (30)
R6: (4 sc, inc) x 6 (36)
R7: (5 sc, inc) x 6 (42)
R8–13: sc around (42)
R14: (5 sc, dec) x 6 (36)
R15: (4 sc, dec) x 6 (30)
R16: (3 sc, dec) x 6 (24)
Insert safety eyes between R10–11, about 8 stitches apart. Stuff firmly. Fasten off with a long tail for sewing.
2. Trunk
With gray-blue:
R1: 6 sc in MR (6)
R2: sc around (6)
R3: (sc, inc) x 3 (9)
R4–10: sc around (9)
R11: (2 sc, inc) x 3 (12)
R12–14: sc around (12)
Stuff lightly, mostly near the base. Fasten off with a long tail. Embroider 3 short horizontal trunk lines after sewing in place.
3. Body
With gray-blue:
R1: 6 sc in MR (6)
R2: inc around (12)
R3: (sc, inc) x 6 (18)
R4: (2 sc, inc) x 6 (24)
R5: (3 sc, inc) x 6 (30)
R6: (4 sc, inc) x 6 (36)
R7–11: sc around (36)
R12: (4 sc, dec) x 6 (30)
R13: (3 sc, dec) x 6 (24)
R14: (2 sc, dec) x 6 (18)
Stuff firmly enough to sit upright. Fasten off with a long tail.
4. Ears (Make 2)
Outer ears in gray-blue:
R1: 6 sc in MR (6)
R2: inc around (12)
R3: (sc, inc) x 6 (18)
R4: (2 sc, inc) x 6 (24)
R5: (3 sc, inc) x 6 (30)
R6–7: sc around (30)
Fasten off with a long tail.
Inner ears in pink (Make 2):
R1: 6 sc in MR (6)
R2: inc around (12)
R3: (sc, inc) x 6 (18)
R4: (2 sc, inc) x 6 (24)
R5: sc around (24)
Fasten off and sew one pink inner ear panel onto each outer ear, leaving a gray-blue border visible.
5. Arms (Make 2)
With gray-blue:
R1: 6 sc in MR (6)
R2: (sc, inc) x 3 (9)
R3–7: sc around (9)
R8: (sc, dec) x 3 (6)
Stuff lightly. Flatten the opening and fasten off with a long tail.
6. Legs (Make 2)
With gray-blue:
R1: 6 sc in MR (6)
R2: inc around (12)
R3: (sc, inc) x 6 (18)
R4–6: sc around (18)
R7: (sc, dec) x 6 (12)
R8–9: sc around (12)
Stuff firmly. Flatten the top slightly and fasten off with a long tail.
7. Toe Details
With white:
Embroider 3 short toe stitches on each foot and 2–3 short toe stitches on each hand if desired.
8. Blush Cheeks (Make 2)
With pink:
R1: 6 sc in MR (6)
Fasten off and sew beneath the eyes.
9. Beanie Hat
With mustard yellow:
R1: 6 sc in MR (6)
R2: inc around (12)
R3: (sc, inc) x 6 (18)
R4: (2 sc, inc) x 6 (24)
R5: (3 sc, inc) x 6 (30)
R6: (4 sc, inc) x 6 (36)
R7–10: sc around (36)
R11: BLO sc around (36)
R12: (5 sc, inc) x 6 (42)
R13–14: sc around (42)
Fasten off. The BLO round helps form the hat bend above the brim.
10. Hat Brim Texture
With mustard yellow:
Join yarn to the front loops left from R11 and work a textured brim:
R1: (sl st, hdc) repeat around
Fasten off. This creates the thicker rolled edge seen in the sample.
11. Pom-Pom
With white:
R1: 6 sc in MR (6)
R2: inc around (12)
R3: sc around (12)
R4: dec around (6)
Stuff lightly or leave soft. Sew to the top center of the hat.
12. Scarf
With mustard yellow:
Ch 42.
Row 1: starting in 2nd ch from hook, sc across (41)
Row 2–4: ch 1, turn, sc across (41)
Fasten off. Wrap around the neck and leave one tail hanging down the front.
13. Scarf Fringe
With white:
Cut short strands of white yarn and knot them through the end of one scarf tail to form fringe. Trim evenly.
14. Face Details
- Insert safety eyes before fully closing the head.
- Sew the trunk centered below the eyes.
- Embroider a short mouth line at the base of the trunk.
- Add pink cheek circles beside the trunk.
- Embroider 3 small horizontal lines across the trunk front.
15. Assembly
- Sew the trunk to the center front of the head.
- Attach the ears to the upper sides of the head, slightly below hat level.
- Sew the head to the top of the body.
- Attach the arms to the upper front sides of the body.
- Sew the legs to the lower front of the body so the elephant sits upright.
- Embroider the white toe details on the feet and hands.
- Place the beanie on the head and tack it in place with a few hidden stitches if desired.
- Sew the white pom-pom to the top of the hat.
- Wrap the scarf around the neck and stitch it lightly in place.
- Add the white fringe to one scarf end, then weave in all remaining ends.
© Image-based reconstructed copy for a winter elephant amigurumi.









