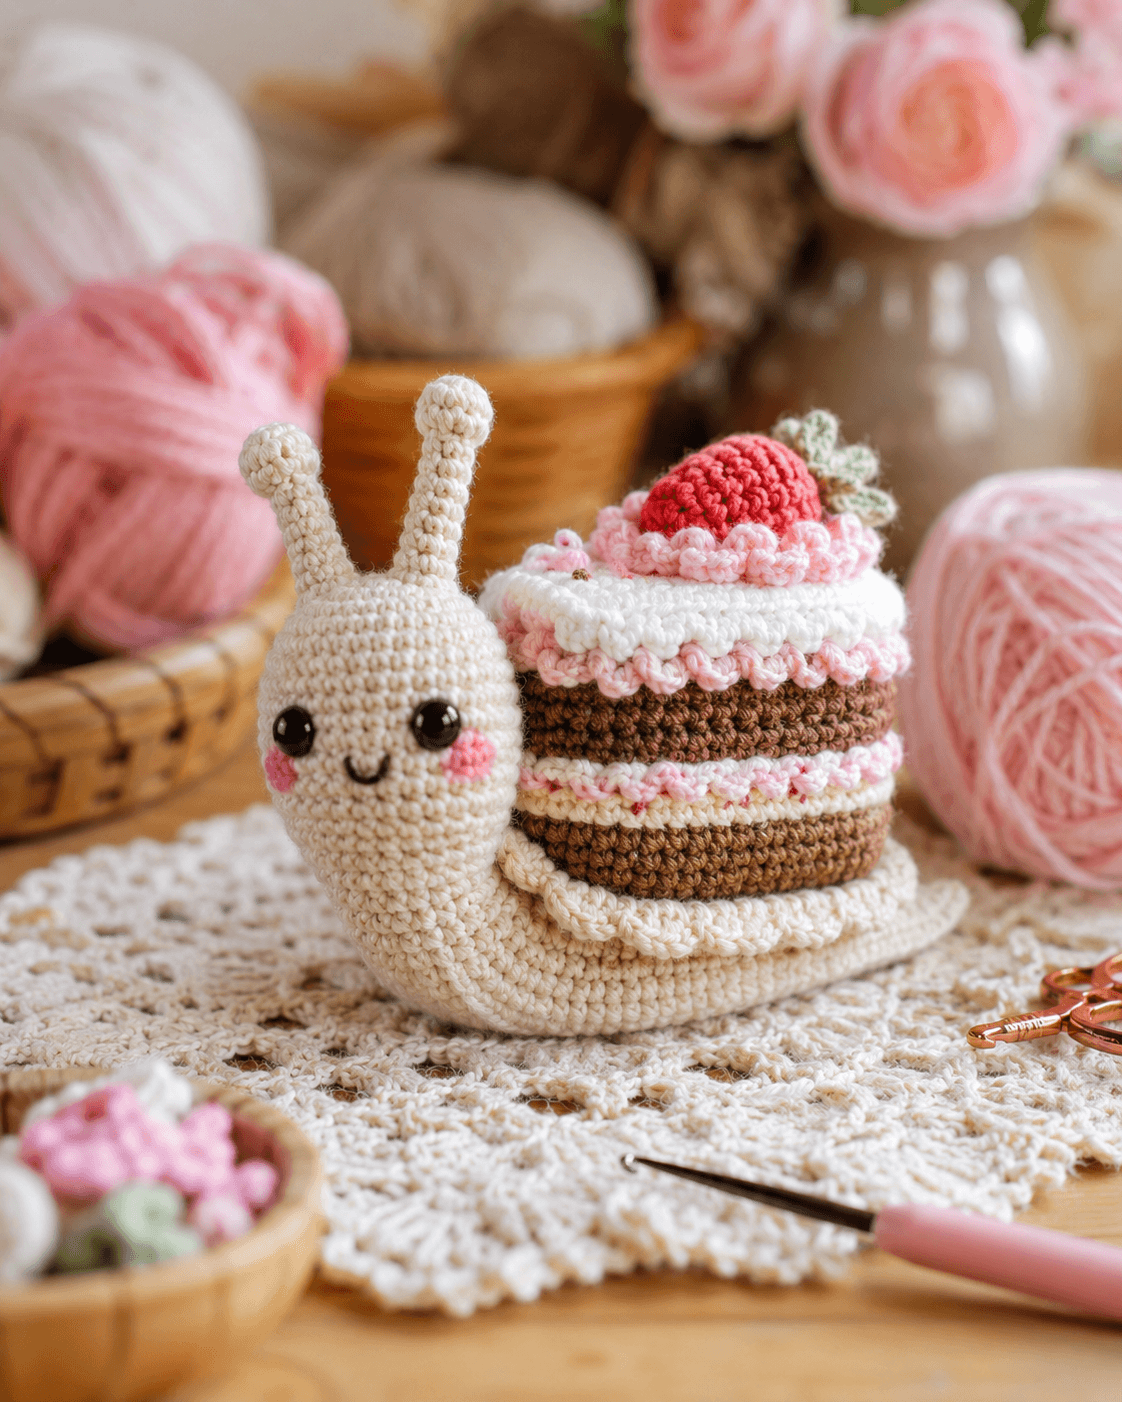
Materials
- Yarn — cream / off-white for snail body and antennae
- Yarn — brown for cake layers
- Yarn — white for whipped cream frosting
- Yarn — light pink for ruffle trim and blush cheeks
- Yarn — soft cream for cake filling
- Yarn — red for strawberry topper
- Yarn — sage or pale green for strawberry leaves
- Embroidery yarn — black for smile
- Safety eyes 8–10 mm
- Polyester stuffing
- Crochet hook 2.5–3.5 mm
- Yarn needle
- Scissors
- Stitch marker
Abbreviations
- MR — magic ring
- sc — single crochet
- inc — increase
- dec — invisible decrease
- sl st — slip stitch
- ch — chain
- hdc — half double crochet
- dc — double crochet
- st — stitch
Notes
- Work in continuous rounds unless stated otherwise.
- The cake shell is made as stacked bands and sewn to the snail body.
- Stuff the head lightly to medium and the cake shell firmly enough to hold its shape.
- Ruffle trims are added after the cake layers are completed.
- Counts are shown in parentheses at the end of each round.
1. Head and Body
R1: 6 sc in MR (6)
R2: inc around (12)
R3: (sc, inc) x 6 (18)
R4: (2 sc, inc) x 6 (24)
R5: (3 sc, inc) x 6 (30)
R6–10: sc around (30)
R11: (3 sc, dec) x 6 (24)
R12–20: sc around (24)
R21: (2 sc, dec) x 6 (18)
R22–30: sc around (18)
Stuff the head and upper neck. Keep the lower body softer so it curves naturally into the tail base. Fasten off with a long tail for sewing or continue directly into the tail if preferred.
2. Tail Base
R1: 6 sc in MR (6)
R2: inc around (12)
R3: (sc, inc) x 6 (18)
R4–16: sc around (18)
R17: (sc, dec) x 6 (12)
R18–24: sc around (12)
Stuff lightly. Curve the tail while sewing it under the back of the body so the shell sits centered above it.
3. Antennae (Make 2)
R1: 4 sc in MR (4)
R2: inc around (8)
R3–4: sc around (8)
R5: (sc, dec) x 2 (6)
R6–11: sc around (6)
Do not overstuff. A tiny amount of filling only in the tip is enough. Fasten off with a long tail for sewing.
4. Side Frill / Foot Edge
With cream / off-white:
Join yarn along the lower outer edge of the tail and body underside.
(2 hdc in one st, sl st in next st) repeat evenly along both visible sides.
Fasten off. This creates the soft rippled edge along the snail foot.
5. Cake Shell Base
With brown:
R1: 6 sc in MR (6)
R2: inc around (12)
R3: (sc, inc) x 6 (18)
R4: (2 sc, inc) x 6 (24)
R5: (3 sc, inc) x 6 (30)
R6: (4 sc, inc) x 6 (36)
R7–12: sc around (36)
Stuff firmly. This forms the lower cake section.
6. Cream Filling Band
With soft cream:
R13–14: sc around (36)
Fasten off if changing color as separate rounds, or continue directly into the next cake section.
7. Upper Cake Layer
With brown:
R15–20: sc around (36)
Fasten off, leaving a tail to close the top if needed.
8. Top Frosting Disk
With white:
R1: 6 sc in MR (6)
R2: inc around (12)
R3: (sc, inc) x 6 (18)
R4: (2 sc, inc) x 6 (24)
R5: (3 sc, inc) x 6 (30)
R6: (4 sc, inc) x 6 (36)
Fasten off and sew to the top of the cake shell.
9. Frosting Ruffles (Make 2 Bands)
With light pink:
Join pink at the top edge of each brown cake section where a frosting border is visible.
(2 sc in next st, sl st in next st) repeat around.
Fasten off. Make one ruffle between the upper and lower cake layers, and one around the top frosting edge.
10. Strawberry Topper
With red:
R1: 6 sc in MR (6)
R2: inc around (12)
R3: (sc, inc) x 6 (18)
R4–5: sc around (18)
R6: (sc, dec) x 6 (12)
Stuff lightly and fasten off.
11. Strawberry Leaves
With pale green:
For each leaf: ch 5, starting in 2nd ch from hook sl st, sc, hdc, sl st.
Make 4 or 5 leaves and sew them together at the strawberry top.
12. Face Details
- Insert safety eyes between R7–8 of the head, about 6 stitches apart.
- Embroider a small curved smile centered below the eyes.
- Sew pink cheek circles or embroider blush beneath each eye.
- Angle the antennae slightly outward to match the upright look in the sample.
13. Assembly
- Sew the tail base to the lower back of the head-body piece so the snail curves naturally.
- Attach the two antennae to the top of the head.
- Add the side frill edging along the body underside if not already done.
- Sew the cake shell securely to the center of the back.
- Attach the white frosting disk to the top of the shell.
- Add the pink frosting ruffles around the cake bands.
- Sew the strawberry leaves to the strawberry topper.
- Attach the strawberry to the center top of the cake shell.
- Check the shell balance and add extra stuffing if needed before closing.
- Weave in all ends.
© Image-based reconstructed copy for a strawberry cake snail amigurumi.









