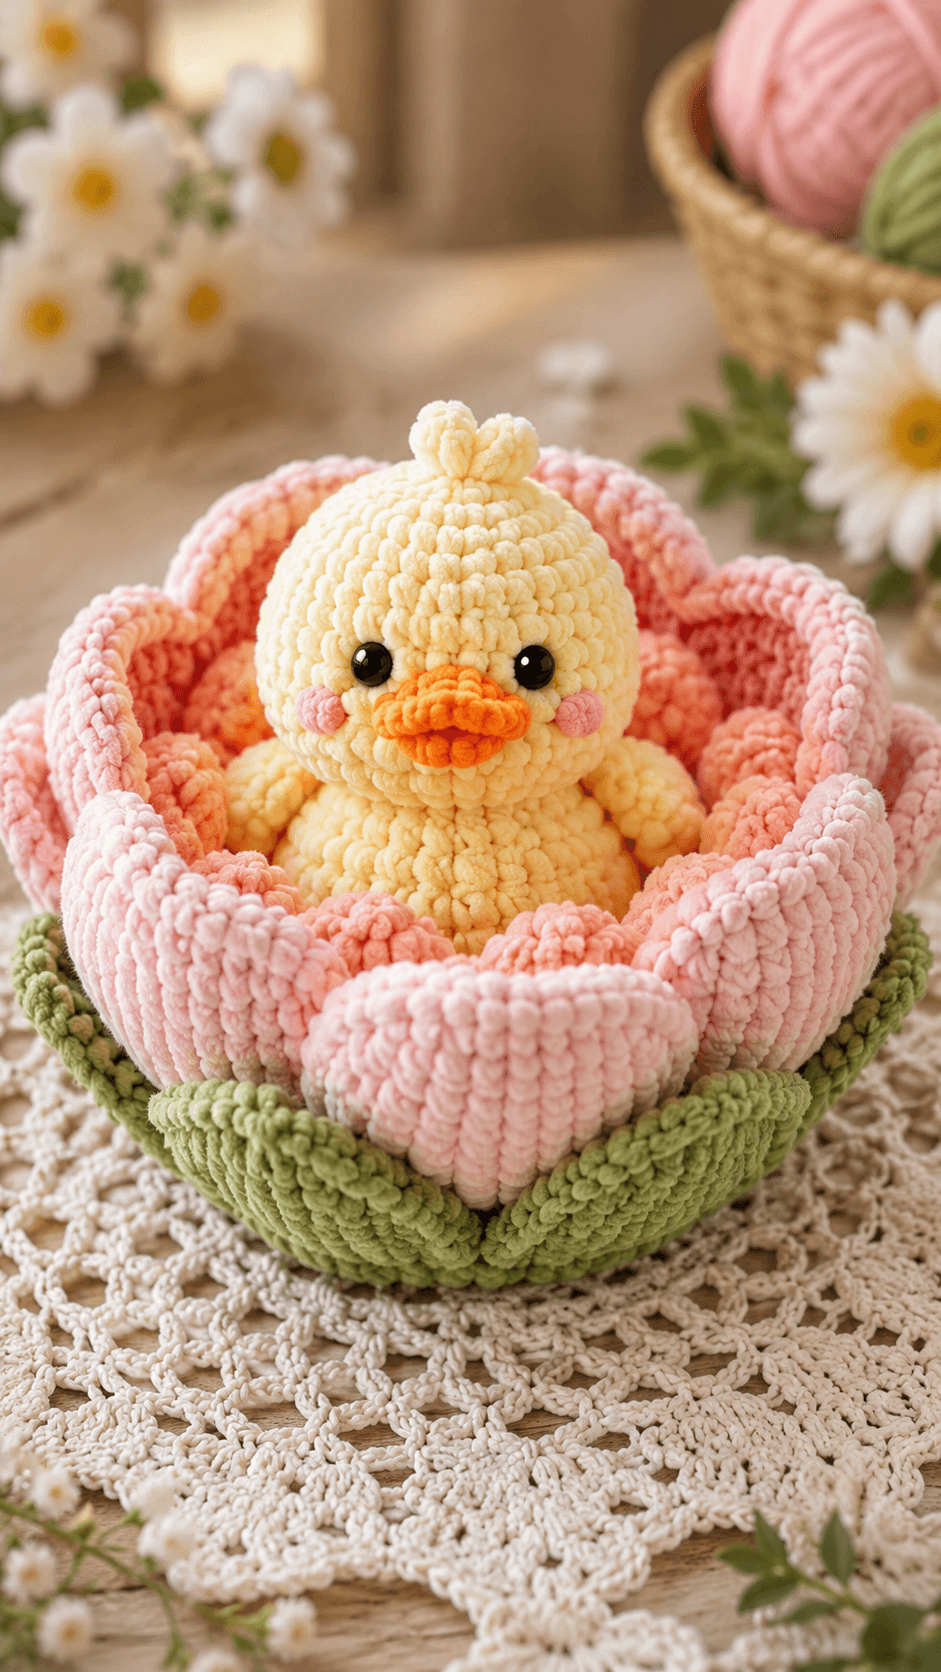
A duckling stops looking like a duck the moment the beak sits too high on the face. This crochet duckling pattern is built around that proportion, with a rounded cream-yellow head, a low orange beak, compact wings, and a seated body nested inside a layered flower basket. The pink petals do most of the framing work. The duck stays simple so the bloom structure remains readable from every angle.
The Design: What Makes This Duck Different
This is not just a small chick with a bowl around it. The flower basket changes the whole construction. You need enough petal height to surround the duck without hiding the face, and the inner wall has to sit close enough to support the body so it does not sink out of view. That means the duck is shaped smaller than a standalone plush and the flower is shaped deeper than a flat blossom base.
The head stays nearly spherical, while the body narrows slightly at the neck and widens again at the seat. That keeps the face prominent above the petal line. The beak is short and broad, not pointed. A pointed beak turns the character into a bird in general. A rounded, low-set beak keeps it clearly in duck territory. The tiny top tuft matters too. Without it, the crown can look plain against the large petal edges.
The most common mistake with this type of design is making the petals too floppy. If the outer flower wall collapses outward, the duck loses its framed center position and the whole piece reads like separate parts instead of one composition.
Project Info at a Glance
| Skill Level | Time | Finished Size | Hook | Best For |
|---|---|---|---|---|
| Intermediate | 6–8 hours | About 18 cm wide | 4.5 mm | Spring decor, nursery shelf, centerpiece display |
Materials and Tools
Yarn
- Pastel yellow chenille — for head, body, wings, and tuft
- Orange chenille or velvet — for beak
- Pink chenille — for inner and outer petals
- Light green chenille — for leaf base
- Pink scrap yarn — for cheek circles
- Black embroidery thread — optional for facial shaping
Tools
- 4.5 mm hook
- 10–12 mm safety eyes
- Polyester stuffing
- Tapestry needle
- Stitch markers
- Pins
Abbreviations
MR = magic ring, sc = single crochet, inc = increase, dec = invisible decrease, sl st = slip stitch, ch = chain, BLO = back loop only, FLO = front loop only, st = stitch.
Use invisible decrease for all shaping rounds. On plush yarn, regular decreases leave larger gaps that show most clearly around the face and petals.
Pattern Notes
Work in continuous rounds unless noted. This pattern is written as an original image-based draft. The duck is made first, then seated into the flower center. The petals are worked as separate pieces and attached around a round bowl-like base.
Pattern — Step by Step
Head (Make 1)
Yarn: pastel yellow
- R1: 6 sc in MR (6)
- R2: inc x6 (12)
- R3: (sc, inc) x6 (18)
- R4: (2 sc, inc) x6 (24)
- R5: (3 sc, inc) x6 (30)
- R6: (4 sc, inc) x6 (36)
- R7-12: sc around (36)
- R13: (4 sc, dec) x6 (30)
- R14: (3 sc, dec) x6 (24)
- R15: (2 sc, dec) x6 (18)
Place safety eyes between R9 and R10 with 6 stitches between them. Stuff firmly before closing.
Fasten off. Leave a 20 cm tail.
Body (Make 1)
Yarn: pastel yellow
- R1: 6 sc in MR (6)
- R2: inc x6 (12)
- R3: (sc, inc) x6 (18)
- R4: (2 sc, inc) x6 (24)
- R5-8: sc around (24)
- R9: (2 sc, dec) x6 (18)
- R10: sc around (18)
- R11: (sc, dec) x6 (12)
Stuff moderately. Keep the lower half firm so the duck sits upright in the flower center.
Fasten off. Leave a 20 cm tail.
Wings (Make 2)
Yarn: pastel yellow
- R1: 6 sc in MR (6)
- R2: inc x6 (12)
- R3-4: sc around (12)
- R5: (sc, dec) x4 (8)
Stuff lightly only at the front edge. Flatten slightly before sewing.
Fasten off. Leave a 15 cm tail.
Feet Bumps (Make 2)
Yarn: pastel yellow
- R1: 6 sc in MR (6)
- R2: inc x6 (12)
- R3: sc around (12)
These sit low at the front and stay mostly hidden by the petals.
Fasten off. Leave a 12 cm tail.
Beak Top (Make 1)
Yarn: orange
- R1: ch 6, sc in 2nd ch from hook and across (5)
- R2: ch 1, turn, inc, 3 sc, inc (7)
- R3: ch 1, turn, sc across (7)
Fasten off. Leave a 15 cm tail.
Beak Bottom (Make 1)
Yarn: orange
- R1: ch 5, sc in 2nd ch from hook and across (4)
- R2: ch 1, turn, inc, 2 sc, inc (6)
- R3: ch 1, turn, sc across (6)
Layer beneath the top beak piece and stitch lightly at the center for a rounded bill shape.
Fasten off. Leave a 12 cm tail.
Cheek Patches (Make 2)
Yarn: pink
- R1: 6 sc in MR (6)
- R2: inc x6 (12)
Fasten off. Leave a 10 cm tail.
Top Tuft Loops (Make 2)
Yarn: pastel yellow
- Ch 6.
- Sl st back into first ch to form a loop.
Make two and stitch together at the crown.
Leave long tails for sewing.
Flower Center Bowl (Make 1)
Yarn: peach-pink
- R1: 6 sc in MR (6)
- R2: inc x6 (12)
- R3: (sc, inc) x6 (18)
- R4: (2 sc, inc) x6 (24)
- R5: (3 sc, inc) x6 (30)
- R6: BLO sc around (30)
- R7-11: sc around (30)
This forms the inner cup that holds the duck. Do not overstuff. It should keep shape while remaining open at the top.
Fasten off. Leave a 25 cm tail.
Inner Petals (Make 8)
Yarn: peach-pink
Work in rows.
- Row 1: ch 7, sc in 2nd ch from hook and across (6)
- Row 2: ch 1, turn, inc, 4 sc, inc (8)
- Row 3: ch 1, turn, sc across (8)
- Row 4: ch 1, turn, inc, 6 sc, inc (10)
- Row 5: ch 1, turn, sc across (10)
- Row 6: ch 1, turn, dec, 6 sc, dec (8)
- Row 7: ch 1, turn, dec, 4 sc, dec (6)
Round the top edge slightly while sewing so each petal cups inward.
Fasten off. Leave a 20 cm tail.
Outer Petals (Make 8)
Yarn: light pink
Work in rows.
- Row 1: ch 9, sc in 2nd ch from hook and across (8)
- Row 2: ch 1, turn, inc, 6 sc, inc (10)
- Row 3: ch 1, turn, sc across (10)
- Row 4: ch 1, turn, inc, 8 sc, inc (12)
- Row 5: ch 1, turn, sc across (12)
- Row 6: ch 1, turn, dec, 8 sc, dec (10)
- Row 7: ch 1, turn, dec, 6 sc, dec (8)
- Row 8: ch 1, turn, sc across (8)
These petals should stand taller than the inner set and flare outward slightly.
Fasten off. Leave a 20 cm tail.
Leaf Base (Make 6)
Yarn: light green
Work in rows.
- Row 1: ch 8, sc in 2nd ch from hook and across (7)
- Row 2: ch 1, turn, dec, 3 sc, dec (5)
- Row 3: ch 1, turn, dec, sc, dec (3)
- Row 4: ch 1, turn, sc across (3)
Shape to a point during assembly. Make enough leaves to cover the flower base evenly.
Fasten off. Leave a 15 cm tail.
Assembly
- Sew the head to the body with the face angled slightly forward.
- Attach the beak low on the face, centered below the eyes.
- Sew the cheek patches beneath and slightly outside the beak corners.
- Attach the top tuft at the crown center.
- Sew the wings to the body sides, keeping them small and low.
- Attach the feet bumps at the lower front of the body.
- Sew the inner petals evenly around the top edge of the flower center bowl.
- Attach the outer petals behind the inner layer, staggering them between the first petal set.
- Sew the leaf base pieces around the lower outside edge of the flower.
- Place the duck into the flower center and secure it with a few hidden stitches through the body base.
The completed piece should show the duck’s full face above the petal line, with the body supported inside the bowl and the flower layers opening evenly around it.
7 Technical Tips
- Place the beak lower than you think. If it rises even one round too high, the face stops reading as duck and starts reading as chick or generic bird.
- Stuff the head more firmly than the body. A soft head sinks into the petal ring and hides the eye line.
- Do not overstuff the wings. Puffy wings project too far and compete with the petals.
- Pin every petal before sewing. Uneven spacing becomes obvious immediately on circular flower builds.
- Use a stable inner bowl. If the flower center collapses inward, the duck tilts and the petal ring warps.
- Stagger the outer petals between the inner ones. Matching both layers point for point creates a flat, less natural bloom shape.
- Anchor the duck at the base. A loose center figure rotates during handling and shifts the face away from the front opening.
Conclusion
This duckling crochet pattern works because the character stays compact while the flower does the framing. Build the duck first, then test its seated height against the center bowl before attaching the petals. After that, adjust the petal flare so the face remains fully visible from the front. Share one top view on Pinterest and one front view on Instagram with #DuckBloomPattern. The final question for this design is specific: do you want the petals to open like a blossom in full sun, or close in slightly around the duck for a nest-like shape?









