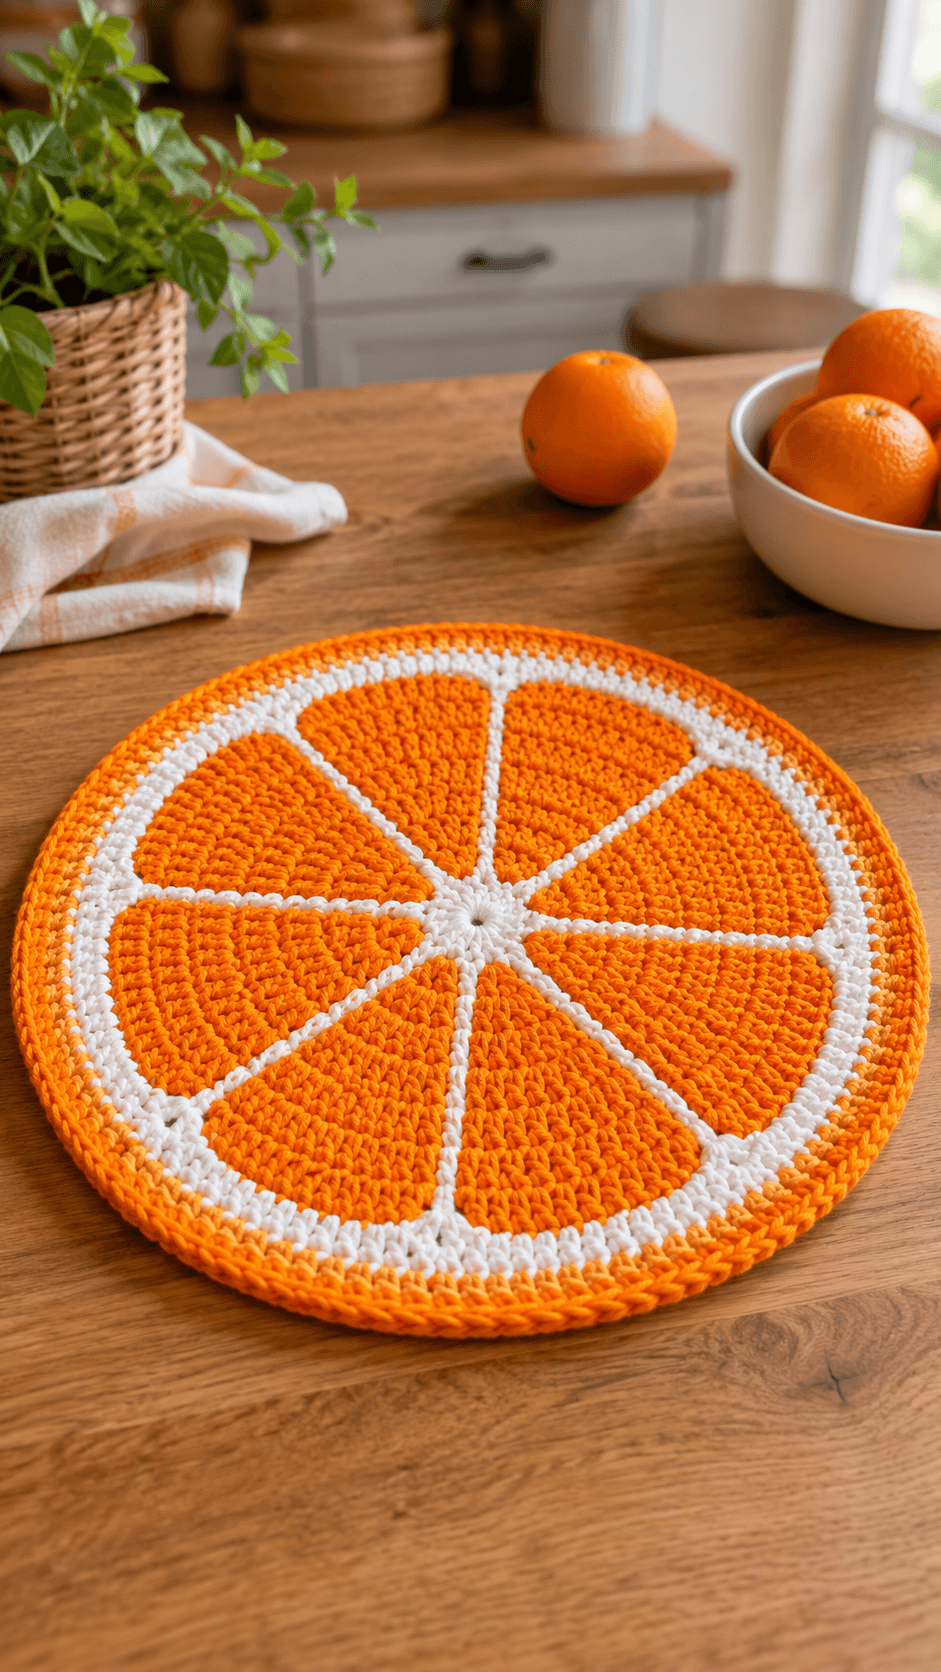
Citrus motifs only work when the wedge lines stay sharp from the center point to the outer rind. That structural rule defines this orange slice crochet placemat pattern. The sample shown here uses bright orange and white cotton yarn to build a round fruit-slice mat with segmented sections, a narrow pith ring, and a firm outer edge. It suits intermediate crocheters who can manage round shaping, clean color changes, and accurate segment spacing across a flat circular piece.
The Design: What Makes This Orange Slice Mat Different
This mat depends on geometry first. The orange wedges must read as equal segments, so the center, divider lines, and rind ring all need consistent spacing. A plain striped circle would not create the same fruit-slice effect.
The second design choice is color contrast. The orange sections are dense and bright, while the white lines act as pith and membrane detail. That contrast is what keeps the wedges readable from a distance. In a fruit crochet placemat, weak contrast makes the design look like an ordinary round mat instead of a citrus slice.
The third choice is edge control. A slightly thicker orange outer ring works as the rind and helps the placemat hold its shape on a table. One common mistake with an orange crochet mat is letting the divider lines drift off-center. That makes the wedges uneven and weakens the full citrus look immediately.
Project Info at a Glance
| Skill Level | Time | Finished Size | Hook | Best For |
|---|---|---|---|---|
| Intermediate | 3–5 hours | Approx. 30–38 cm / 12–15 in | 3.5–4.5 mm | Placemats, kitchen decor, summer table styling, fruit-themed gifts |
Materials and Tools
Yarn
- Bright orange cotton yarn — DK or worsted — approx. 70–110 g
- White cotton yarn — DK or worsted — approx. 20–35 g
Tools
- Crochet hook 3.5 mm to 4.5 mm
- Tapestry needle
- Stitch markers
- Scissors
- Measuring tape
- Blocking mat, optional
Abbreviations
- MR = magic ring
- ch = chain
- sl st = slip stitch
- sc = single crochet
- hdc = half double crochet
- dc = double crochet
- inc = increase
- rep = repeat
- sp = space
For a segmented circle like this, even tension matters more than speed. One tight section can pull the wedge lines inward and distort the full round.
Construction Overview
This placemat is worked from the center outward in joined rounds. The small center point is built first, then the wedge sections are created with orange stitch panels separated by white divider lines. After the segments are established, a white ring is added to represent the pith, followed by a final orange outer band for the rind. The result is a flat circular mat that reads clearly as an orange slice.
Center Circle
The center should stay compact. If it grows too large, the wedge segments start too far out and the placemat loses the fruit-slice proportion. A small white or pale center works best because it gives every segment a clear meeting point.
- Begin with an MR in white.
- Work the first round in sc or hdc.
- Increase evenly for one or two rounds until the center reaches a modest size.
- Mark the points where the wedge divider lines will extend outward.
Orange Wedge Sections
The orange sections are the main body of the placemat. Each wedge should widen gradually as the rounds expand. The easiest way to preserve the citrus look is to build the orange areas as repeated segment panels between fixed white divider lines.
- Join orange yarn and begin the first segmented round.
- Work orange stitches between the marked divider points.
- Keep each wedge the same width increase from round to round.
- Continue until the orange flesh area reaches the desired diameter.
The sample shows eight wedge sections. That count keeps the fruit look clean and balanced without making the dividers too narrow.
White Divider Lines
The white lines are what separate this from a plain round orange mat. They should run outward from the center like citrus membranes and stay narrow but visible. Surface crochet, colorwork sections, or embroidered slip stitches can all work depending on your preferred construction method.
- Use white yarn to create narrow radial divider lines between each orange wedge.
- Keep the lines centered from the middle point to the outer ring.
- Check symmetry after every second divider so the spacing stays even.
Pith Ring
The white ring around the wedges acts as the pith layer. It separates the orange flesh from the rind and makes the fruit motif more believable. This ring should be slightly thicker than the divider lines so it reads clearly at the table.
- Join white yarn around the outer edge of the orange wedge section.
- Work one or two rounds evenly, depending on how thick you want the pith.
- Keep the round flat and consistent before switching back to orange.
Outer Rind
The final orange ring acts as the rind and gives the placemat a finished edge. A firmer stitch helps this border hold shape, especially if the mat will be used under dishes or bowls.
- Join orange yarn to the outer white ring.
- Work one or more rounds in sc or hdc for stability.
- Fasten off neatly and weave in all ends on the back.
Assembly and Finishing
- Complete the center circle first.
- Build the orange wedge area with evenly spaced segment divisions.
- Add or reinforce the white divider lines.
- Work the white pith ring around the full circle.
- Finish with the orange rind border.
- Block lightly if the edges need flattening.
Color Placement Notes
Keep the wedges and outer rind bright orange, with the center, divider lines, and pith ring in white. That arrangement matches the sample and keeps the fruit motif immediate. Off-white can work, but the contrast should stay crisp enough to separate each segment clearly.
Common Failure Points
- Wedges looking uneven: The divider marks were not spaced equally at the start. Count and mark all segments before expanding the circle.
- Mat rippling: Too many increases were added in the outer rounds. Reduce the increase rate and check flatness after each round.
- Divider lines drifting: The white sections were not centered as the round expanded. Re-mark the midpoint of each wedge before continuing.
- Outer ring curling: The rind border is too tight for the circumference. Loosen tension or add a small number of extra stitches.
- Fruit effect disappearing: The white pith ring is too thin or too close in color to the orange yarn. Increase contrast and ring width slightly.
Where This Mat Works Best
This style works well as a placemat, centerpiece base, fruit bowl mat, summer brunch accent, or kitchen gift project. It performs best in bright table settings where the full circle can stay visible. Because the motif is bold and graphic, it also works well for themed seasonal decor or playful breakfast table styling.
Conclusion
An orange slice crochet placemat works when the wedges stay balanced and the white divider lines remain sharp from center to rind. Focus on equal segment spacing, flat round construction, and crisp color contrast. For the closest match to the sample, use eight orange wedges, a narrow white pith ring, and a firm orange outer border. Once finished, the piece reads immediately as a citrus slice while still functioning as a practical crochet table mat.









