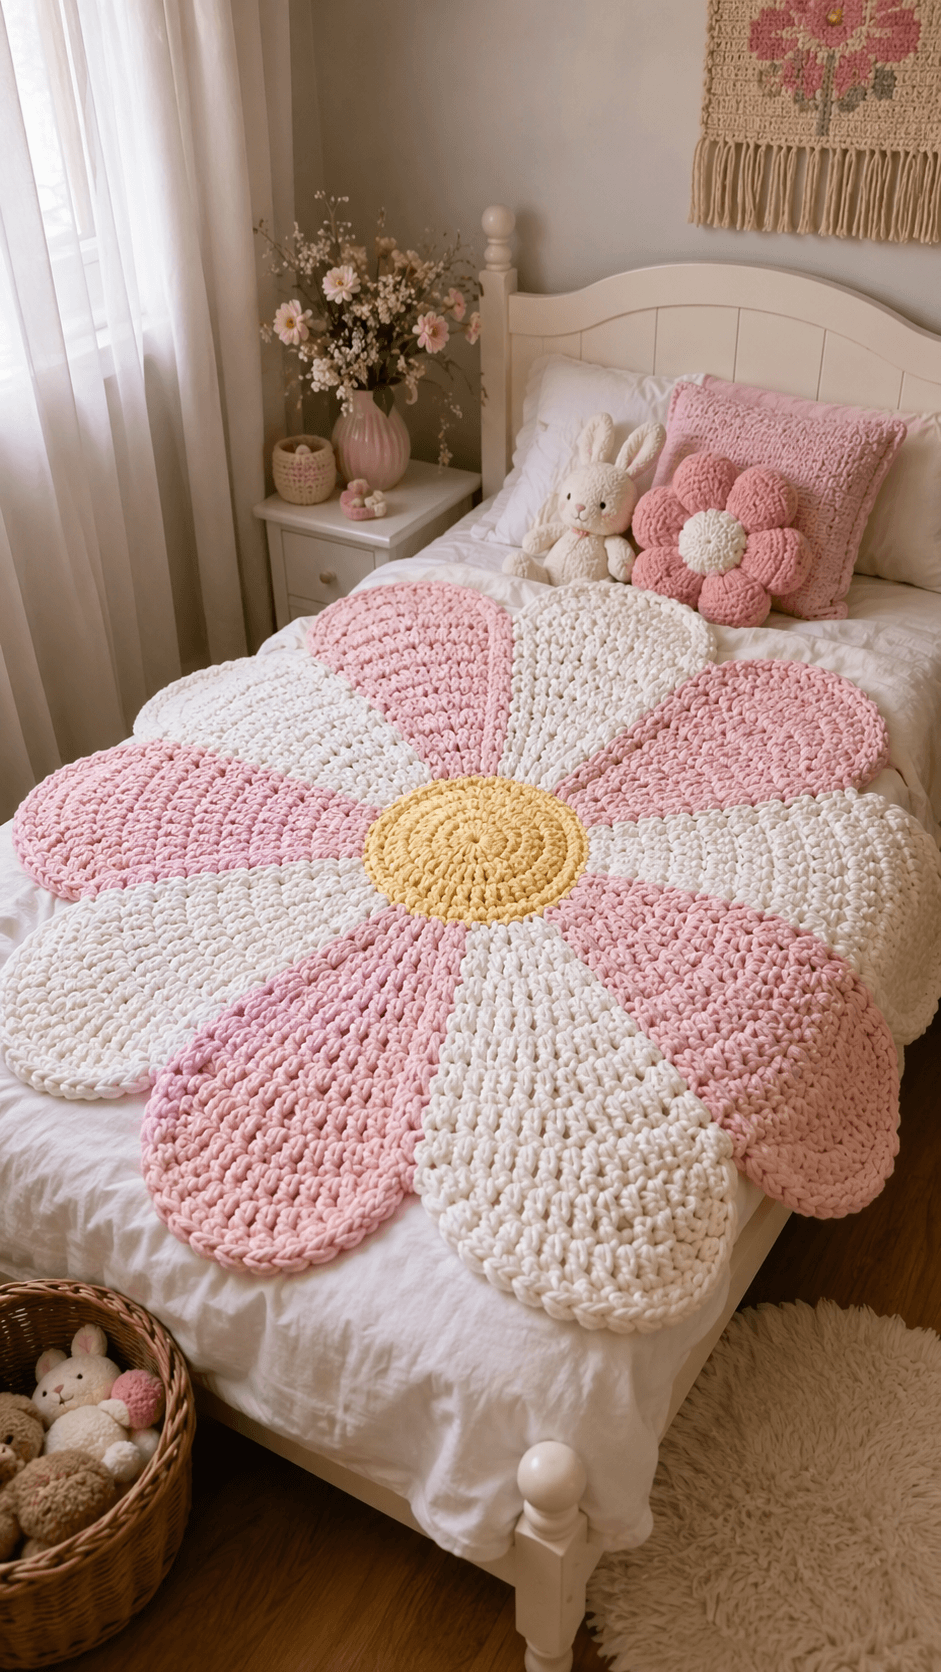
Oversized petals change a blanket from a rectangle into a shaped floral cover with a fixed visual center. That structure defines this daisy flower crochet blanket pattern. The sample shown here uses chunky yarn in blush pink, cream, and soft yellow, with broad rounded petals radiating from a circular center. It suits intermediate crocheters who can manage large-scale shaping, clean color changes, and stable joins across heavy blanket sections.
The Design: What Makes This Daisy Blanket Different
This blanket depends on silhouette before stitch detail. The flower shape is the main feature, so the center must stay round, the petals must remain evenly spaced, and the outer edges must curve smoothly without collapsing. A standard square blanket with floral colors would not produce the same effect.
The second design choice is petal proportion. These petals are wide, soft, and oversized, which gives the blanket a plush decorative look while still covering most of the bed surface. In a flower crochet blanket, narrow petals can look sharp and decorative, but broad petals make the piece read as functional bedding.
The third choice is color placement. Alternating pink and cream petals keep the shape readable, while the yellow center anchors the whole piece visually. One common mistake with a daisy crochet blanket is letting the petal joins pull too tightly. That distorts the round center and makes the petals curl upward instead of lying flat.
Project Info at a Glance
| Skill Level | Time | Finished Size | Hook | Best For |
|---|---|---|---|---|
| Intermediate | 16–28 hours | Approx. 110–140 cm across | 8–12 mm | Kids’ beds, reading nooks, nursery decor, statement throws |
Materials and Tools
Yarn
- Soft yellow yarn — super bulky or jumbo — approx. 120–180 g
- Cream yarn — super bulky or jumbo — approx. 600–900 g
- Blush pink yarn — super bulky or jumbo — approx. 600–900 g
Tools
- Crochet hook 8 mm to 12 mm
- Tapestry needle
- Stitch markers
- Scissors
- Measuring tape
- Blocking space or flat mattress surface
Abbreviations
- MR = magic ring
- ch = chain
- sl st = slip stitch
- sc = single crochet
- hdc = half double crochet
- dc = double crochet
- inc = increase
- dec = decrease
- rep = repeat
- sp = space
With thick yarn, stitch tension affects shape immediately. One tight section can pull a petal inward and make the full flower look uneven.
Construction Overview
This blanket is worked in major sections rather than as a standard row-based throw. The yellow center is crocheted first as a round disk. After that, petal sections are built outward around the circle, alternating colors to create the daisy effect. Each petal can be crocheted directly from the center edge or made separately and joined, depending on the structure you prefer. The photographed sample reads as a joined floral build with thick, heavily textured petal panels.
Center Circle
The middle of the blanket needs enough width to support all petal sections evenly. A compact center makes the petals bunch together. An oversized center weakens the flower look. The sample uses a proportionally moderate disk that gives the petals a clear starting edge without dominating the blanket.
- Begin with an MR in yellow.
- Work the first round in sc or hdc.
- Increase evenly in joined or continuous rounds to maintain a flat circle.
- Continue until the center reaches the desired diameter.
- Fasten off neatly and mark the petal division points around the edge.
Petal Structure
Each petal is broad and rounded rather than pointed. That means the petal should widen early, hold its width through the middle, and taper only near the tip. In chunky yarn, simple stitches often look fuller than complex lace, so dense construction works better for this kind of blanket.
Direct-Join Petal Method
- Join pink or cream yarn to a marked section on the center circle.
- Work outward in rows, increasing along both sides to build the rounded petal width.
- Maintain the middle section with even rows once the petal reaches its full width.
- Decrease gradually near the top to form a soft rounded end.
- Fasten off and repeat for each marked section, alternating colors.
Separate Petal Method
- Crochet each petal individually from the center edge outward.
- Shape with gradual side increases, then a short plateau, then side decreases.
- Make the required number of petals in alternating pink and cream.
- Join them evenly around the yellow center using whip stitch, slip stitch, or mattress-style seaming.
The photographed blanket shows eight large petals. That count keeps the flower bold and readable at blanket scale.
Color Placement Notes
Keep the center soft yellow and alternate the petals between blush pink and cream. That arrangement matches the sample and prevents the large flower shape from blending together. Too many shades would weaken the clean petal rhythm. A slightly warmer ivory can replace cream, but the contrast between petal colors should remain visible from across the room.
Texture and Stitch Choice
The sample uses thick yarn with visible surface texture, which gives the petals a cushioned look. Half double crochet and double crochet are both suitable here because they build fabric quickly without becoming too stiff. For extra definition, front post or rib-like rows can be added sparingly, but the main body should stay soft enough to drape over a bed.
A dense stitch pattern also helps the petal edges remain stable. Open lace would not support this shaped blanket well at jumbo scale.
Assembly
- Complete the yellow center circle first.
- Mark equal petal divisions around the center edge.
- Work or attach each petal one at a time, alternating pink and cream.
- Check symmetry after every second petal.
- Join all petal bases securely so no gaps open between sections.
- Weave in all ends on the back.
- Lay the blanket flat and shape each petal by hand.
Optional Edge Refinement
This type of blanket usually does not need a traditional border because the petal outline acts as the finished edge. If a cleaner edge is needed, work one round of sc around each petal separately or add a final contour row that follows the full flower shape. Keep it minimal. A heavy border would blur the petal definition.
Common Failure Points
- Petals curling upward: Too few increases were added near the petal base or middle. Widen the shaping earlier.
- Center puckering: The round center does not have enough stitches for the petal count. Increase the final center round before joining petals.
- Petals mismatched in size: Row counts vary between colors. Measure each petal before fastening off.
- Blanket feeling too stiff: The hook is too small for the yarn. Go up a size to improve drape.
- Gaps between petals: Join points are too far apart or too loose. Reinforce the petal bases after assembly.
Where This Blanket Works Best
This style works best as a decorative bed throw, nursery accent, reading corner blanket, or photo prop for a child’s room. It is more visually specific than a standard rectangle, so it performs best where the full floral outline can be seen. Folded over the foot of a bed, it still reads clearly as a daisy because the petal scale is large enough to remain visible.
Conclusion
A daisy flower crochet blanket works when the center stays balanced and the petals stay uniform in width, length, and spacing. Focus on clean shaping, stable joins, and controlled color alternation. For the closest match to the sample, use thick yarn, keep the yellow center compact, and build eight oversized petals in alternating pink and cream. Once finished, the blanket reads as both usable bedding and a large-scale floral statement piece.









