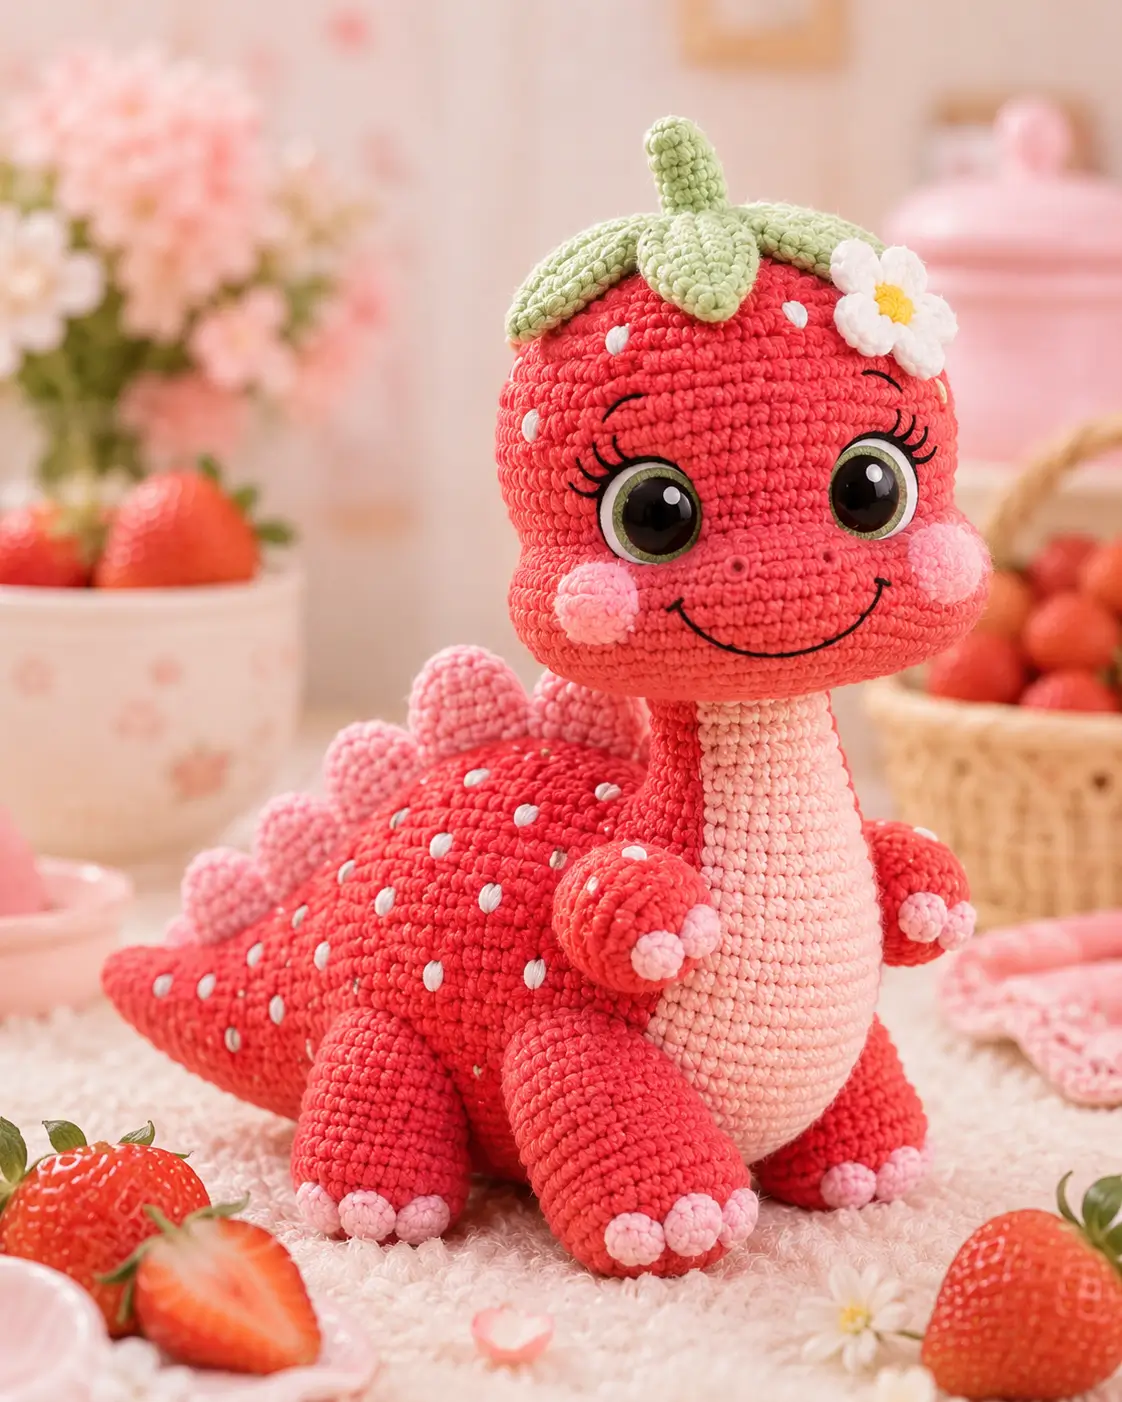
A strawberry dinosaur needs leaf placement before it needs claws. This strawberry dinosaur amigurumi crochet pattern builds a red plush dino with a pale belly, green crown leaves, white flower, round cheeks, and 12 mm safety eyes. Use super bulky chenille, a 5 mm hook, and intermediate-beginner skills for a sitting toy sized about 22 cm, useful for market tables because the silhouette reads fast.
The Design: What Makes Strawberry Dino Different
You are shaping a fruit skin over a dinosaur body, so the head must stay round while the tail and legs keep the reptile readable. The pattern uses a 42-stitch head plateau for the oversized berry face, then a 36-stitch body plateau so the toy sits without tipping forward. A narrow light-pink belly panel breaks the red mass and gives the long neck a clear front line.
The maker should pin that panel before sewing; a crooked belly is the most common failure in a crochet strawberry dinosaur because the face and flower exaggerate every tilt. The leaf crown replaces horns, and the back spikes are short green caps, not sharp plates. That keeps the strawberry dino crochet pattern soft while still giving a fruit dinosaur crochet profile.
Project Info at a Glance
| Skill Level | Time | Finished Size | Hook | Best For |
|---|---|---|---|---|
| Intermediate-beginner | One long session | About 22 cm sitting | 5.0 mm | Chenille plush, décor, market display |
Materials and Tools
Yarn
- Strawberry red chenille — Super Bulky #6 — 65–70 g — Premier Parfait Chunky or similar
- Light pink chenille — Super Bulky #6 — 35–40 g — belly, paws, cheeks
- Light green chenille — Super Bulky #6 — 5–8 g — leaf crown and spikes
- White chenille or worsted — 3 g — flower petals and seed spots
- Yellow chenille or worsted — 2–3 g — flower center
Tools
- Hook 5.0 mm
- 12 mm safety eyes
- Polyester stuffing
- Yarn needle
- Stitch markers
- Sewing pins
- Scissors
- Black embroidery thread
Abbreviations
MR = magic ring; sc = single crochet; inc = 2 sc in next stitch; dec = single crochet 2 together; sl st = slip stitch; ch = chain; BLO = back loop only; st = stitch; R = round or row. Invisible decrease means working the front loops of the next 2 stitches together so the closure line stays flatter.
Pattern — Step by Step
Continuous spiral unless noted. This is an original construction using standard amigurumi math.
Head
Yarn: strawberry red.
R1: 6 sc in MR (6)
R2: inc ×6 (12)
R3: (sc, inc) ×6 (18)
R4: (2 sc, inc) ×6 (24)
R5: (3 sc, inc) ×6 (30)
R6: (4 sc, inc) ×6 (36)
R7: (5 sc, inc) ×6 (42)
R8–R14: sc around (42)
Insert 12 mm safety eyes between R10 and R11, 8 stitches apart. Start stuffing after R15.
R15: (5 sc, dec) ×6 (36)
R16: (4 sc, dec) ×6 (30)
R17: (3 sc, dec) ×6 (24)
R18: (2 sc, dec) ×6 (18)
R19: (sc, dec) ×6 (12)
R20: dec ×6 (6)
Fasten off. Weave through front loops and close.
Body
Yarn: strawberry red.
R1: 6 sc in MR (6)
R2: inc ×6 (12)
R3: (sc, inc) ×6 (18)
R4: (2 sc, inc) ×6 (24)
R5: (3 sc, inc) ×6 (30)
R6: (4 sc, inc) ×6 (36)
R7–R14: sc around (36)
Stuff firmly through the lower half. Keep the top slightly softer for sewing the head.
R15: (4 sc, dec) ×6 (30)
R16: sc around (30)
R17: (3 sc, dec) ×6 (24)
R18: sc around (24)
R19: (2 sc, dec) ×6 (18)
R20: (sc, dec) ×6 (12)
R21: dec ×6 (6)
Fasten off. Leave a 25 cm tail for reinforcing the body base.
Belly Panel
Yarn: light pink.
R1: ch 8, sc in 2nd ch from hook and across (7)
R2: inc, 5 sc, inc (9)
R3: inc, 7 sc, inc (11)
R4–R16: sc across, ch 1, turn (11)
R17: dec, 7 sc, dec (9)
R18: dec, 5 sc, dec (7)
R19: sc around the full edge; place 2 sc in each rounded corner (38)
Fasten off. Leave a 40 cm tail for sewing.
Arms / Front Legs
Yarn: light pink for paw, strawberry red for arm. Make 2.
R1: 6 sc in MR with light pink (6)
R2: inc ×6 (12)
R3: (sc, inc) ×6 (18)
R4: sc around (18)
Change to strawberry red.
R5–R9: sc around (18)
R10: (sc, dec) ×6 (12)
R11–R13: sc around (12)
Stuff the paw firmly and the upper arm lightly.
R14: flatten opening and sc across both layers (6)
Fasten off. Leave a 25 cm tail.
Back Legs
Yarn: light pink for foot, strawberry red for leg. Make 2.
R1: 6 sc in MR with light pink (6)
R2: inc ×6 (12)
R3: (sc, inc) ×6 (18)
R4: (2 sc, inc) ×6 (24)
R5: sc around (24)
Change to strawberry red.
R6–R9: sc around (24)
R10: (2 sc, dec) ×6 (18)
R11–R13: sc around (18)
Stuff the foot enough to hold a flat sitting angle.
R14: flatten opening and sc across both layers (9)
Fasten off. Leave a 30 cm tail.
Tail
Yarn: strawberry red.
R1: 6 sc in MR (6)
R2: inc ×6 (12)
R3: (sc, inc) ×6 (18)
R4: sc around (18)
R5: (2 sc, inc) ×6 (24)
R6–R8: sc around (24)
R9: (3 sc, inc) ×6 (30)
R10–R12: sc around (30)
Stuff from tip to base, with the tip softer than the base.
Fasten off. Leave a 35 cm tail.
Leaf Top Ears
Yarn: light green. Make 2.
R1: ch 9, sc in 2nd ch from hook, hdc, dc, dc, hdc, sc, sl st, sl st (8)
R2: working down the opposite side of the chain, sl st, sl st, sc, hdc, dc, dc, hdc, sc (16 total edge sts)
Fasten off. Leave a 20 cm tail. Do not stuff.
Back Leaf Spikes
Yarn: light green. Make 5.
R1: 6 sc in MR (6)
R2: inc ×6 (12)
R3–R4: sc around (12)
Flatten each spike; do not stuff.
R5: sc across both layers (6)
Fasten off. Leave a 20 cm tail.
Muzzle / Nose Dots
Yarn: black embroidery thread.
Make two straight stitches over R11 of the head, each nostril 1 stitch wide. Place them 3 stitches apart and centered between the eyes. Add a shallow smile from R13 to R14, spanning 12–14 stitches across the face.
Cheek Patches
Yarn: light pink. Make 2.
R1: 6 sc in MR (6)
R2: inc ×6 (12)
R3: (sc, inc) ×6 (18)
Sl st to finish.
Fasten off with a 20 cm sewing tail.
White Seed Spots
Yarn: white.
Make 12–16 small embroidered seed marks across the head, body, and tail. Each mark should be 1 stitch tall. Keep seeds at least 3 stitches away from the eye washers and seam lines.
Flower Accessory
Yarn: white petals, yellow center.
Center:
R1: 6 sc in MR with yellow (6)
Sl st to close.
Petals:
Join white to any stitch.
R2: (ch 3, 2 dc in same st, ch 3, sl st in same st, sl st in next st) ×6 (6 petals)
Fasten off. Leave a 25 cm tail.
Assembly
- Sew the head to the upper body with the face centered over the belly line.
- Pin the belly panel from the lower head seam down the front of the body.
- Sew the belly panel in small backstitches, checking that it stays centered every 2 cm.
- Attach the cheek patches between R12 and R14 of the head, outside the smile.
- Sew the front legs to the body at R10–R13, angled toward the belly panel.
- Attach the back legs at the lower front of the body with 3–4 cm between inner feet.
- Sew the tail to the back base of the body, matching its centerline to the belly panel.
- Place the two leaf top ears on the crown and sew only the base edge.
- Add the five back leaf spikes from crown to upper tail, spacing them 2–3 cm apart.
- Sew the flower beside one crown leaf, then weave every yarn tail through stuffed sections.
The completed toy is a sitting strawberry dinosaur with a red body, pale belly, green crown, flower, cheeks, and embroidered seeds.
7 Technical Tips
- Stitch marker drift creates a diagonal face seam. Move the marker after each round only when the pattern tells you to, not when the spiral appears to lean.
- Stuffing gaps show fastest under 5 mm chenille stitches. Add stuffing in 2 cm pieces so the head fills evenly without hard lumps.
- Eye placement failure is permanent after the washers lock. Insert 12 mm eyes between R10 and R11, then check both from the front and from above before pressing washers down.
- Loose invisible decreases make the cheek area pucker. Pull the working yarn flat after each dec on R15–R20 of the head.
- Velvet tension changes the finished height by several centimeters. Keep the hook path tight enough that no white stuffing is visible between two stretched stitches.
- Pinning errors rotate the belly panel. Use three pins on the centerline first: chin, middle body, and lower body.
- Tail weaving can pull chenille bald at the seam. Weave tails through red stitches for at least 5 cm, then bury the final end inside the body.
Conclusion
Before publishing, weigh the finished red and pink yarn leftovers and add your exact gram use to the materials box. That gives the next maker better buying data than yardage alone. Photograph the toy from the front, side, and top so the leaf crown, tail angle, and belly panel are clear. Pin the finished strawberry dinosaur on Pinterest and post the side-view assembly result on Instagram with #StrawberryDino. The strawberry dinosaur amigurumi crochet pattern works best when the seed spots stay sparse near the eyes and denser across the body. Which feature should control the silhouette first: the leafy crown, the flower, or the tail curve?









