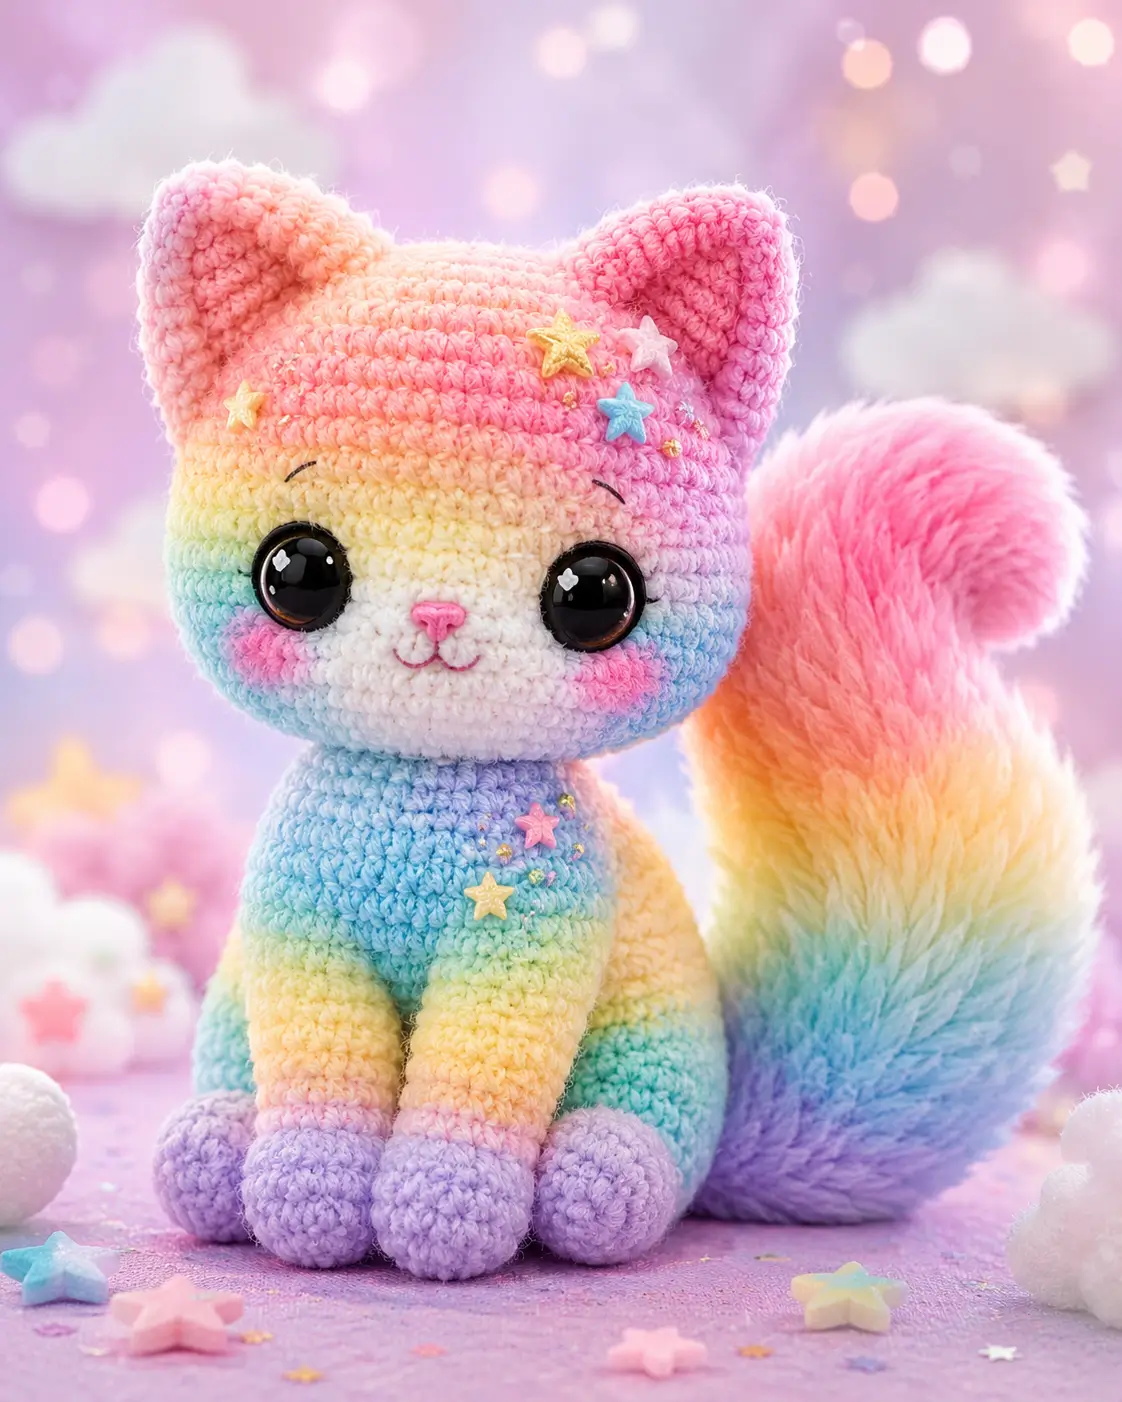
Cat ears are triangles, but a rainbow kitten reads wrong unless those triangles break the color bands. This rainbow cat amigurumi crochet pattern builds a 28–30 cm seated cat with pastel stripes, oversized eyes, a white muzzle, cheek patches, star charms, and a brushed tail. Materials stay in light worsted/DK-weight yarn with a 3 mm hook. Skill level: advanced beginner with clean sewing. The wide tail helps it sit without tipping.
The Design: What Makes Nova Different
Nova is built around three proportions: a wide head, a smaller seated body, and a tail that acts like a rear support. The oversized head gives room for 20 mm eyes, cheek patches, and a centered white muzzle without crowding the face. A narrower body keeps the crochet rainbow kitten seated instead of blocky. The front legs are longer than the back legs because the photo shows paws stacked forward, not tucked flat under the body. The tail is the main structural feature. It needs a firm crocheted core before the brushed or faux-fur layer is added, or it will collapse sideways. The common mistake in a pastel rainbow cat crochet pattern is placing ears too low. Cat ears should sit above the forehead curve, not on the side wall, or the silhouette turns into a bear.
Project Info at a Glance
| Skill Level | Time | Finished Size | Hook | Best For |
|---|---|---|---|---|
| Advanced beginner / intermediate | Not published by rainbow cat sources | 28–30 cm | 3.0 mm for #3 light cotton | Shelf plush, nursery decor, photo prop |
Rainbow cat sources verify 28–30 cm finished size, #3 light yarn, and 3.0 mm hook guidance for a similar sewn-limb rainbow cat.
Materials and Tools
Yarn
- Pastel rainbow variegated yarn — #3 light / DK-style cotton blend — 100 g — Alize Cotton Gold Batik or similar.
- White yarn — same weight — 15 g — for muzzle and face center.
- Lavender yarn — same weight — 20 g — for paws and lower color bands.
- Pink yarn — same weight — 10 g — for cheeks, nose embroidery, and small stars.
- Yellow, blue, and peach scraps — same weight — 5 g each — for star charms.
- Brushed faux-fur or fuzzy yarn — matching pastel blend — 20 g — for the tail surface.
Tools
- Hook 3.0 mm
- 20 mm safety eyes for photo-scale plush look
- Fiberfill stuffing
- Yarn needle
- Locking stitch markers
- Long pins
- Black embroidery thread
- Pink embroidery thread
- Small slicker brush for tail fuzzing
- Scissors
Abbreviations
MR = magic ring; sc = single crochet; inc = 2 sc in next stitch; dec = single crochet two stitches together; sl st = slip stitch; ch = chain; BLO = back loop only; FO = fasten off. Invisible decrease pulls the front loops of the next two stitches together so the decrease line does not create dark holes.
Pattern — Step by Step
Work in a continuous spiral unless a section says otherwise. Move the stitch marker after every round. Color placement follows the photo: warm shades across the crown, white at the muzzle, blue through the lower face and chest, yellow at the forelegs, and lavender at the paws.
Head
Yarn: pastel rainbow, with white held for muzzle area later.
R1: 6 sc in MR (6)
R2: inc ×6 (12)
R3: (1 sc, inc) ×6 (18)
R4: (2 sc, inc) ×6 (24)
R5: (3 sc, inc) ×6 (30)
R6: (4 sc, inc) ×6 (36)
R7: (5 sc, inc) ×6 (42)
R8: sc around in peach/pink (42)
R9: sc around in pink (42)
R10: sc around in pale yellow (42)
R11: sc around in pale yellow/white blend (42)
R12: sc around in white at front and blue at sides (42)
R13: sc around in blue (42)
R14: sc around in blue/lavender (42)
R15: sc around in lavender/pink (42)
R16: sc around in pink (42)
R17: (5 sc, dec) ×6 (36)
R18: (4 sc, dec) ×6 (30)
R19: (3 sc, dec) ×6 (24)
R20: (2 sc, dec) ×6 (18)
R21: (1 sc, dec) ×6 (12)
R22: dec ×6 (6)
Insert safety eyes between R11 and R12, about 10–11 stitches apart, before closing. Stuff firmly, especially under the forehead.
Fasten off. Leave 20 cm tail for closing.
Body
Yarn: pastel rainbow.
R1: 6 sc in MR (6)
R2: inc ×6 (12)
R3: (1 sc, inc) ×6 (18)
R4: (2 sc, inc) ×6 (24)
R5: (3 sc, inc) ×6 (30)
R6: (4 sc, inc) ×6 (36)
R7: sc around in blue (36)
R8: sc around in blue (36)
R9: sc around in blue/green (36)
R10: sc around in green (36)
R11: sc around in yellow (36)
R12: sc around in yellow (36)
R13: sc around in peach/pink (36)
R14: (4 sc, dec) ×6 (30)
R15: sc around (30)
R16: (3 sc, dec) ×6 (24)
R17: sc around (24)
R18: (2 sc, dec) ×6 (18)
R19: (1 sc, dec) ×6 (12)
R20: dec ×6 (6)
Stuff the lower body firmly, then reduce stuffing near the neck so the head can sit flat.
Fasten off. Leave 25 cm tail for sewing.
Front Legs / Arms: Make 2
Yarn: lavender paw, then pastel yellow/blue.
R1: 6 sc in MR with lavender (6)
R2: inc ×6 (12)
R3: (1 sc, inc) ×6 (18)
R4: sc around (18)
R5: sc around (18)
R6: (1 sc, dec) ×6 (12)
R7: sc around in pale pink (12)
R8: sc around in yellow (12)
R9: sc around in yellow (12)
R10: sc around in mint (12)
R11: sc around in blue (12)
R12: sc around in blue (12)
R13: sc around in body color (12)
R14: sc around (12)
Lightly stuff the paw only. Leave the upper arm flat so it hangs cleanly against the body.
Fasten off. Leave 18 cm tail.
Back Legs: Make 2
Yarn: lavender paw, then pastel rainbow.
R1: 6 sc in MR with lavender (6)
R2: inc ×6 (12)
R3: (1 sc, inc) ×6 (18)
R4: sc around (18)
R5: sc around (18)
R6: sc around (18)
R7: (1 sc, dec) ×6 (12)
R8: sc around in pink (12)
R9: sc around in yellow (12)
R10: sc around in mint/blue (12)
Stuff the paw to a round oval. Keep the top half soft for sewing at an angle.
Fasten off. Leave 18 cm tail.
Ears: Make 2
Yarn: outer ear in pastel pink/peach, inner ear in deeper pink surface stitching.
R1: 6 sc in MR (6)
R2: inc ×6 (12)
R3: (1 sc, inc) ×6 (18)
R4: (2 sc, inc) ×6 (24)
R5: sc around (24)
R6: sc around (24)
R7: sc around (24)
Flatten each ear and pinch the lower edge into a triangle. Do not stuff. Add inner-ear lines with pink yarn before sewing.
Fasten off. Leave 22 cm tail.
Muzzle
Yarn: white.
R1: 6 sc in MR (6)
R2: inc ×6 (12)
R3: (1 sc, inc) ×6 (18)
R4: sc around (18)
Do not overstuff. The muzzle should sit as a low oval, not a ball.
Fasten off. Leave 20 cm tail.
Cheek Patches: Make 2
Yarn: pink.
R1: 6 sc in MR (6)
R2: inc ×6 (12)
Sl st to first stitch (12)
Leave patches flat. Steam is not needed; finger-shape them into soft circles.
Fasten off. Leave 12 cm tail.
Fluffy Tail
Yarn: pastel rainbow core, then brushed faux-fur or fuzzy yarn overlay.
R1: 6 sc in MR (6)
R2: inc ×6 (12)
R3: (1 sc, inc) ×6 (18)
R4: (2 sc, inc) ×6 (24)
R5: sc around (24)
R6: sc around (24)
R7: sc around (24)
R8: sc around (24)
R9: (2 sc, dec) ×6 (18)
R10: sc around (18)
R11: sc around (18)
R12: sc around (18)
R13: sc around (18)
R14: sc around (18)
R15: sc around (18)
R16: sc around (18)
R17: sc around (18)
R18: sc around (18)
R19: sc around (18)
R20: sc around (18)
R21: sc around (18)
R22: sc around (18)
R23: sc around (18)
R24: sc around (18)
R25: (1 sc, dec) ×6 (12)
R26: sc around (12)
R27: sc around (12)
R28: sc around (12)
R29: sc around (12)
R30: sc around (12)
R31: sc around (12)
R32: sc around (12)
R33: dec ×6 (6)
Stuff as you go. Brush only the outer surface, away from the stitch posts, so the tail keeps its tube structure.
Fasten off. Leave 30 cm tail.
Star Charms: Make 5
Yarn: yellow, pink, and blue scraps.
R1: 6 sc in MR (6)
R2: inc ×6 (12)
Point round: *(sl st in next st, ch 2, sc in second ch from hook, sl st in next st)* ×6 (12 base sts)
Make two yellow stars, two pink stars, and one blue star. Sew three on the head and two on the chest.
Fasten off. Leave 10 cm tail.
Nose, Mouth, and Brows
Yarn: pink and black embroidery thread.
Work a small satin-stitch triangle nose over the center of the muzzle. Add one vertical pink stitch under the nose. Add two curved mouth stitches below it. Place two short black brow stitches above the eyes, angled slightly downward toward the center.
Assembly
- Sew the head to the body with the body opening centered under R18–R20 of the head.
- Add extra stuffing into the neck before the final six sewing stitches.
- Pin the muzzle between the eyes with its top edge one round below the eyes.
- Sew the cheek patches beside the muzzle, level with the lower third of each eye.
- Attach the ears from R4 to R9 of the head, with the inner edges angled toward the center.
- Sew the front legs to the upper body so the lavender paws touch at the front.
- Sew the back legs to the lower body at a forward angle, leaving a flat sitting base.
- Attach the tail to the rear body from R8 to R13 and tack the lower curve to the sitting base.
- Sew star charms on the upper right head and chest, spacing them at least 1 cm apart.
- Weave every tail through stuffed areas, not through surface stitches, then trim close.
The finished cat should sit without hand support when the tail is tacked to the lower back.
7 Technical Tips
- Stitch marker drift: If the marker shifts more than 3 stitches from the back center, the color bands will spiral across the face. Add one offset sc at the rear before each major color change.
- Stuffing firmness: A head this wide needs firm stuffing at R8–R16 or the eyes will sink inward. Stop adding stuffing when the fabric is rounded but the stitches are not stretched open.
- Invisible decrease holes: Standard decreases leave dark gaps on pale yellow and white rounds. Work every decrease through front loops only on R17–R22 of the head.
- Eye placement timing: Safety eyes must be locked before R18 of the head becomes too narrow for fingers. Test placement with pins first, keeping the eyes 10–11 stitches apart.
- Fuzzy tail tension: Faux-fur yarn hides stitches and can make the tail grow unevenly









