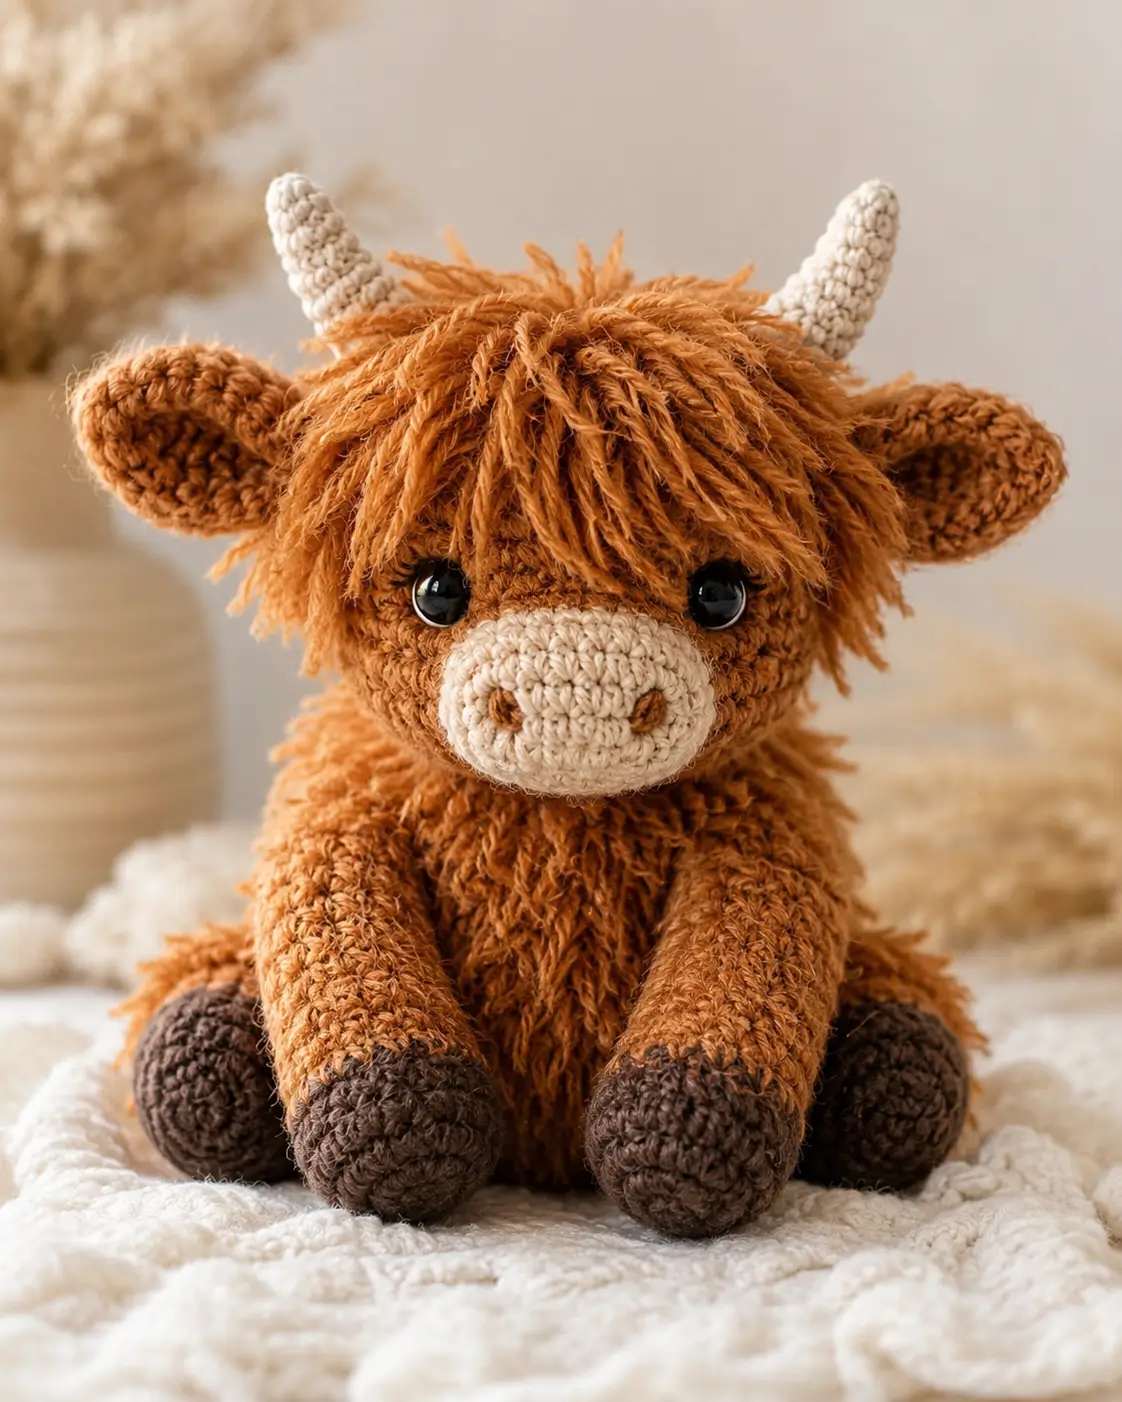
Highland cattle hide their eyes under a shaggy forelock, so this highland cow amigurumi crochet pattern starts by controlling fringe length. You will make a 21 cm sitting cow with DK yarn, a 3.25 mm hook, safety eyes, stuffing, and sewn features. The skill level is motivated beginner because the shaping is standard but the mane needs measured placement. It works well as a nursery shelf farm animal.
The Design: What Makes This Highland Cow Different
This Highland cow amigurumi uses a compact sitting body so the front legs can rest forward instead of hanging at the sides. That choice matches the photo: the hooves are visible, heavy, and darker than the body. The head is wider than the body because the snout, horns, ears, and fringe all compete for space on the same face plane. A narrow head would crowd those details. The mane is made with a stitched strip plus added strands, not only loose yarn, so the fringe has an anchor line before trimming. The common maker mistake is placing the horns too far forward. That makes the animal read like a goat. For a crochet Highland cow, the horns should sit behind the forelock line and slightly inside the ears. Comparable patterns also treat ears, horns, hair, and tail as separate finishing parts.
Project Info at a Glance
| Skill Level | Time | Finished Size | Hook | Best For |
|---|---|---|---|---|
| Motivated beginner | 4–5 hours | 21 cm sitting | 3.25 mm | Nursery shelf, farm display, market sample |
Materials and Tools
Yarn
- Rusty caramel brown — DK / 8-ply — 70 g — Paintbox Cotton DK Soft Fudge or similar warm brown.
- Oatmeal cream — DK / 8-ply — 20 g — Paintbox Cotton DK Vanilla Cream or similar cream for muzzle and horns.
- Dark chocolate brown — DK / 8-ply — 10 g — cotton or acrylic DK for hooves.
- Black or dark rust embroidery yarn — scraps — nostrils and optional eye catchlights.
Tools
- Hook 3.25 mm
- 9 mm safety eyes
- Polyester stuffing
- Yarn needle
- Stitch markers
- Sewing pins
- Small comb or pet slicker brush for the mane only
Abbreviations
- MR = magic ring
- sc = single crochet
- inc = 2 sc in one stitch
- dec = single crochet 2 stitches together
- sl st = slip stitch
- ch = chain
- BLO = back loop only
- FLO = front loop only
- R = round or row
An invisible decrease is worked through the front loops of the next 2 stitches to remove one stitch with less surface bulk.
Pattern — Step by Step
Continuous spiral unless noted. The rounds below use standard 6-stitch amigurumi shaping: increase rounds add 6 stitches, decrease rounds remove 6 stitches, and the medium plateau is 36 stitches.
Head — Make 1
Yarn: rusty caramel brown
R1: 6 sc in MR (6)
R2: inc ×6 (12)
R3: (sc, inc) ×6 (18)
R4: (2 sc, inc) ×6 (24)
R5: (3 sc, inc) ×6 (30)
R6: (4 sc, inc) ×6 (36)
R7: sc around (36)
R8: sc around (36)
R9: sc around (36)
R10: sc around (36)
R11: sc around (36)
R12: sc around (36)
Insert safety eyes between R9 and R10, 7 stitches apart. Check that the future fringe line will not cover both eyes fully.
R13: (4 sc, dec) ×6 (30)
R14: (3 sc, dec) ×6 (24)
R15: sc around (24)
R16: (2 sc, dec) ×6 (18)
R17: (sc, dec) ×6 (12)
Stuff firmly at the cheeks and lightly at the crown.
R18: dec ×6 (6)
Fasten off. Weave through the front loops and close.
Body — Make 1
Yarn: rusty caramel brown
R1: 6 sc in MR (6)
R2: inc ×6 (12)
R3: (sc, inc) ×6 (18)
R4: (2 sc, inc) ×6 (24)
R5: (3 sc, inc) ×6 (30)
R6: (4 sc, inc) ×6 (36)
R7: sc around (36)
R8: sc around (36)
R9: sc around (36)
R10: sc around (36)
R11: sc around (36)
R12: sc around (36)
R13: sc around (36)
R14: sc around (36)
R15: (4 sc, dec) ×6 (30)
R16: sc around (30)
R17: (3 sc, dec) ×6 (24)
R18: sc around (24)
R19: (2 sc, dec) ×6 (18)
R20: (sc, dec) ×6 (12)
Stuff the base firmly. Keep the top slightly softer so the head can sit down into the neck.
R21: dec ×6 (6)
Fasten off. Leave a 35 cm tail for sewing.
Arms / Front Legs — Make 2
Yarn: dark chocolate brown, then rusty caramel brown
Start with dark chocolate brown.
R1: 6 sc in MR (6)
R2: inc ×6 (12)
R3: (sc, inc) ×6 (18)
R4: sc in BLO around (18)
R5: sc around (18)
R6: (sc, dec) ×6 (12)
Change to rusty caramel brown.
R7: sc around (12)
R8: sc around (12)
R9: sc around (12)
R10: sc around (12)
R11: sc around (12)
R12: sc around (12)
R13: sc around (12)
R14: sc around (12)
R15: sc around (12)
Stuff the hoof firmly. Leave the top 2 cm unstuffed so the arm angles forward.
Fasten off. Leave a 30 cm tail.
Back Legs — Make 2
Yarn: dark chocolate brown, then rusty caramel brown
Start with dark chocolate brown.
R1: 6 sc in MR (6)
R2: inc ×6 (12)
R3: (sc, inc) ×6 (18)
R4: (2 sc, inc) ×6 (24)
R5: sc in BLO around (24)
R6: sc around (24)
R7: (2 sc, dec) ×6 (18)
Change to rusty caramel brown.
R8: sc around (18)
R9: sc around (18)
R10: sc around (18)
R11: sc around (18)
R12: sc around (18)
R13: sc around (18)
R14: (sc, dec) ×6 (12)
Stuff the hoof and lower leg. Keep the final round flat enough to sit against the body.
R15: dec ×6 (6)
Fasten off. Leave a 30 cm tail.
Ears — Make 2
Yarn: rusty caramel brown
R1: 6 sc in MR (6)
R2: inc ×6 (12)
R3: (sc, inc) ×6 (18)
R4: sc around (18)
R5: sc around (18)
R6: (sc, dec) ×6 (12)
Do not stuff. Flatten the ear, pinch the lower edge, and sew through both layers to make a shallow cup.
Fasten off. Leave a 25 cm tail.
Horns — Make 2
Yarn: oatmeal cream
R1: 6 sc in MR (6)
R2: sc around (6)
R3: sc around (6)
R4: sc around (6)
R5: inc ×6 (12)
R6: sc around (12)
R7: sc around (12)
R8: sc around (12)
R9: dec ×6 (6)
Stuff only the base. Use the yarn tail to pull the tip slightly inward so each horn curves up.
Fasten off. Leave a 30 cm tail.
Snout / Muzzle — Make 1
Yarn: oatmeal cream
R1: 6 sc in MR (6)
R2: inc ×6 (12)
R3: (sc, inc) ×6 (18)
R4: (2 sc, inc) ×6 (24)
R5: sc around (24)
R6: (2 sc, dec) ×6 (18)
Stuff lightly. Flatten into a horizontal oval while pinning.
Fasten off. Leave a 40 cm tail. Embroider two nostrils with dark rust yarn, each 2 stitches wide and angled inward.
Shaggy Mane and Forelock — Make 1 Strip + Strands
Yarn: rusty caramel brown
Row 1: ch 17, sc in 2nd ch from hook and across (16)
Row 2: ch 1, turn, (sl st in next st, ch 10, sl st in same st, sc in next st) ×8 (16 base sts, 8 loops)
Row 3: ch 1, turn, sc across the base edge (16)
Fasten off. Leave a 40 cm tail. Cut 26 strands of rusty caramel yarn, each 10–12 cm long. Attach them with lark’s-head knots along the front edge of the strip. Trim only after the horns and ears are sewn.
Cheek Patches — Make 2
Yarn: oatmeal cream or a lighter tan
R1: 6 sc in MR (6)
R2: inc ×6 (12)
Sl st to the next stitch (12)
Fasten off. Leave a 20 cm tail. Keep the patches flat and place them half under the outer edges of the muzzle.
Tail — Make 1
Yarn: rusty caramel brown with dark chocolate brown tip
Row 1: ch 7, sc in 2nd ch from hook and across (6)
Fasten off the base strand. Join 4 dark chocolate brown strands, each 8 cm long, to one end with lark’s-head knots. Trim the tassel to 3 cm. Leave the opposite end for sewing.
Accessory From Photo
No separate accessory is visible in the photo, so no accessory piece is added.
Assembly
- Sew the body to the bottom of the head, centering the body under R14–R18 of the head.
- Pin the snout across the lower face, with its top edge just below the safety eyes.
- Sew the snout in place, adding a small amount of stuffing before closing the final 2 cm.
- Place the cheek patches partly under the muzzle edges and sew them flat.
- Pin both ears to the sides of the head at R8–R11, angled slightly downward.
- Sew the horns inside the ears, with 4–5 cm between horn bases across the crown.
- Attach the mane strip between the horns, then add extra strands until the brow looks full.
- Sew the arms to the front body between R11 and R15, with hooves pointing forward.
- Sew the back legs to the base of the body so the cow sits without tipping.
- Attach the tail to the back body between R8 and R10, then weave in all tails.
The finished cow should sit upright with both eyes still visible under the forelock.
7 Technical Tips
- Round drift: Move the stitch marker into the first stitch of every round. A 1-stitch drift on the head shifts the forelock by about 3–4 mm.
- Neck collapse: Pack the lower body firmly, then leave the top 1.5–2 cm slightly softer. Over-soft stuffing at the base makes the head tilt backward.
- Visible decrease holes: Work each decrease as an invisible decrease through FLO only. Standard decreases can leave dark gaps on the cream muzzle.
- Eye placement timing: Insert safety eyes after R12 of the head and before the first decrease round. After R13, the eye backs become harder to press flat.
- Mane length: Cut fringe strands to 10–12 cm first, then trim to 4–5 cm after sewing. Cutting short before attachment leaves uneven gaps above the eyes.
- Horn placement failure: Horns sewn in front of the ears make the toy read as a goat. Keep horn bases slightly behind the front edge of the mane strip.
- Tail weaving: Weave each sewn limb tail through at least 3 cm of stuffed fabric before trimming. Shorter buried tails can work loose when the legs are handled.
Conclusion
Block the mane before final trimming, not after the horns are sewn tight. The finished cow reads correctly when the forelock sits low but still leaves both safety eyes visible from the front. Save the project notes with yarn brand, hook, eye size, and finished height before making a second version; those four numbers control the whole silhouette. For the final pass, photograph the toy from eye level on a plain blanket, then share the highland cow amigurumi crochet pattern result on Pinterest and Instagram. Use #HighlandCowAmigurumi. Which fringe length gives your cow the most Highland-cattle look: brow-length, eye-skimming, or snout-grazing?









