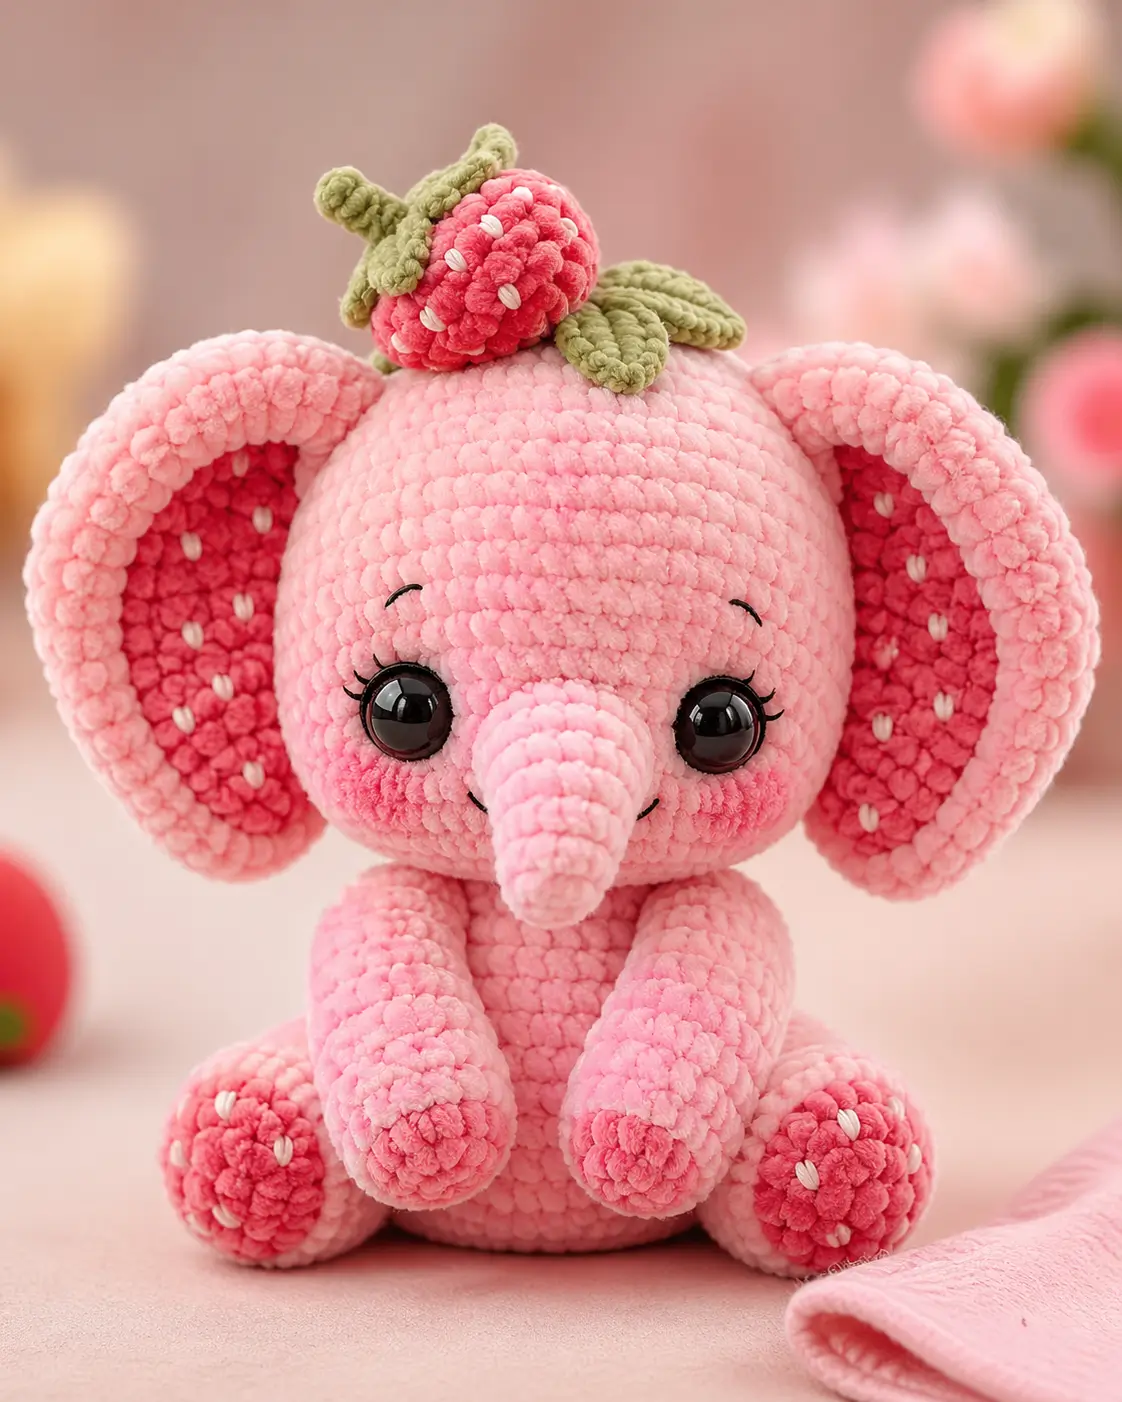
An elephant only looks right in plush chenille when the trunk projects beyond the cheeks without pulling the forehead out of round. This elephant amigurumi crochet pattern uses super bulky chenille, a 5.0 mm hook, and 12 mm eyes to make a seated toy about 15–16 cm tall. The build suits an intermediate maker and gives you a compact nursery-shelf plush with a removable strawberry topper.
The Design: What Makes This Elephant Different
The structure depends on three choices. First, you keep the head close to spherical and sew the trunk on as a separate cone, because chenille shortens visible length and a built-in trunk often reads too blunt. Second, the ears use a larger outer disc with a smaller contrast insert, which creates the deep bowl shape visible in the photo and keeps the edge from collapsing. Third, the back legs carry the width while the arms stay narrow, so the sitting elephant amigurumi settles on its base instead of tipping forward. In a plush elephant crochet pattern, the common failure is placing the ears too high and too flat. Then the face starts to resemble a mouse. Here the ear fold is pinned first, stitched second, and spread after stuffing.
Project Info at a Glance
| Skill Level | Time | Finished Size | Hook | Best For |
|---|---|---|---|---|
| Intermediate | Half-day build | 15–16 cm | 5.0 mm | Display plush, gift topper |
Materials and Tools
Yarn
- Blush pink chenille — super bulky — 100 g — Himalaya Dolphin Baby or YarnArt Dolce
- Deep pink chenille — super bulky — 20–25 g — same base yarn for inner ears, feet, and strawberry
- Olive green yarn — light accent — 5 g — smooth cotton or chenille for the strawberry cap
- Cream cotton — embroidery accent — 2 g — for seed marks
- Black embroidery thread — trace amount — for lashes, brows, and smile
Tools
- Hook 5.0 mm
- 12 mm safety eyes
- Polyester stuffing
- Tapestry needle
- Stitch markers
- Sewing pins
Abbreviations
- MR = magic ring
- sc = single crochet
- inc = increase
- dec = invisible decrease
- sl st = slip stitch
- ch = chain
- BLO = back loop only
- FO = fasten off
Invisible decrease is used on visible shaping rounds so the chenille surface stays closed instead of showing paired holes.
Pattern — Step by Step
Continuous spiral unless noted.
Head (Make 1)
Yarn: blush pink chenille
- R1: 6 sc in MR (6)
- R2: inc x6 (12)
- R3: (1 sc, inc) x6 (18)
- R4: (2 sc, inc) x6 (24)
- R5: (3 sc, inc) x6 (30)
- R6: (4 sc, inc) x6 (36)
- R7–R11: sc around (36)
- R12: (4 sc, dec) x6 (30)
- R13: sc around (30)
- R14: (3 sc, dec) x6 (24)
- R15: sc around (24)
- R16: (2 sc, dec) x6 (18)
- R17: (1 sc, dec) x6 (12)
- R18: dec x6 (6)
Insert safety eyes between R8 and R9, 8 stitches apart. Stuff firmly by R16 and keep the front face rounded rather than flattened.
Fasten off. Leave 18 cm tail.
Body (Make 1)
Yarn: blush pink chenille
- R1: 6 sc in MR (6)
- R2: inc x6 (12)
- R3: (1 sc, inc) x6 (18)
- R4: (2 sc, inc) x6 (24)
- R5: (3 sc, inc) x6 (30)
- R6–R10: sc around (30)
- R11: (3 sc, dec) x6 (24)
- R12: sc around (24)
- R13: (2 sc, dec) x6 (18)
- R14: sc around (18)
- R15: (1 sc, dec) x6 (12)
- R16: dec x6 (6)
Shape the lower half broad and flat while stuffing so the toy will sit without a stand.
Fasten off. Leave 18 cm tail.
Arms / Front Legs (Make 2)
Yarn: deep pink chenille to blush pink chenille
- R1: 6 sc in MR (6)
- R2: inc x6 (12)
- R3–R4: sc around (12)
- Change to blush pink.
- R5–R11: sc around (12)
Stuff only the paw and lower half. Overstuffing here pushes the arms too far forward.
Fasten off. Leave 25 cm tail.
Back Legs (Make 2)
Yarn: deep pink chenille to blush pink chenille
- R1: 6 sc in MR (6)
- R2: inc x6 (12)
- R3: (1 sc, inc) x6 (18)
- R4–R5: sc around (18)
- Change to blush pink.
- R6: BLO sc around (18)
- R7: (1 sc, dec) x6 (12)
- R8–R10: sc around (12)
Stuff the front half of the foot and the first third of the leg. Add 4–5 short cream seed stitches on each foot pad before sewing on.
Fasten off. Leave 25 cm tail.
Ears (Make 2 outer ears and 2 inner ears)
Yarn: blush pink outer ear, deep pink inner ear
Inner ear (make 2):
- R1: 6 sc in MR (6)
- R2: inc x6 (12)
- R3: (1 sc, inc) x6 (18)
- R4: (2 sc, inc) x6 (24)
- R5: (3 sc, inc) x6 (30)
Fasten off.
Outer ear (make 2):
- R1: 6 sc in MR (6)
- R2: inc x6 (12)
- R3: (1 sc, inc) x6 (18)
- R4: (2 sc, inc) x6 (24)
- R5: (3 sc, inc) x6 (30)
- R6: (4 sc, inc) x6 (36)
Sew one inner ear to one outer ear, centering the insert. Embroider 5–6 cream seed dashes on each inner ear, then pinch the top edge into a 2 cm fold and tack it once.
Fasten off. Leave 30 cm tail on the outer ear.
Trunk (Make 1)
Yarn: blush pink chenille
- R1: 6 sc in MR (6)
- R2–R3: sc around (6)
- R4: inc x6 (12)
- R5–R7: sc around (12)
- R8: inc x6 (18)
- R9–R12: sc around (18)
Stuff lightly from the base upward. Keep the tip softer than the base so the trunk angles down and then forward after sewing.
Fasten off. Leave 30 cm tail.
Cheek Patches (Make 2)
Yarn: rosy pink
- R1: 6 sc in MR (6)
- R2: inc x6 (12)
- Sl st in next stitch.
Do not stuff. These sit slightly below the eyes and beside the trunk seam.
Fasten off. Leave 12 cm tail.
Strawberry Topper (Make 1 berry, 1 cap)
Yarn: deep pink berry, olive green cap, cream seed embroidery
Berry:
- R1: 6 sc in MR (6)
- R2: inc x6 (12)
- R3: (1 sc, inc) x6 (18)
- R4–R5: sc around (18)
- R6: (1 sc, dec) x6 (12)
- R7: dec x6 (6)
Lightly stuff before R7. Embroider 6–8 cream seed dashes after closing.
Leaf cap:
- R1: 5 sc in MR (5)
- Leaf 1: ch 4, sl st in 2nd ch from hook, sc in next ch, sl st in next ch, sl st in next base stitch
- Repeat Leaf 1 four more times.
Stem:
- Join yarn at cap center, ch 5, sl st back down the chain.
- Ch 4, sl st back down the chain.
Fasten off. Leave 20 cm tail for assembly.
Face Details
Yarn: black embroidery thread
Embroider a 4-stitch eyebrow arc above each eye. Add 3 short lash stitches at the outer edge of each eye only. Sew the cheek patches so their top edges sit one round below the eye line. Stitch a shallow smile centered under the trunk base with one stitch on each side angled upward.
Assembly
- Sew the head to the top center of the body with the face aligned to the widest part of the seat. Pack a little extra stuffing into the neck zone before closing the seam.
- Pin the trunk to the lower front of the head so the top edge sits below the eyes and the tip points slightly down. Stitch the base evenly all the way around, then press the tip forward with your fingers.
- Place the cheek patches below the eyes and one stitch width away from the trunk seam. Sew only around the outer edge so each cheek stays slightly raised.
- Attach the back legs first. The outer edge of each leg should sit just forward of the body midpoint so the plush can rest on both feet and the lower body at once.
- Sew the front legs to the body two rounds below the head seam. Angle them inward a little so the paws sit toward the center line rather than straight down.
- Pin each ear with the folded top edge pointing backward and the lower ear edge flaring forward. Sew only along the upper third and the fold tack so the rest of the ear stays loose and bowl-shaped.
- Check the face from the front and from a three-quarter side view. The ears should frame the cheeks, not hide them.
- Sew the strawberry topper slightly off center on the crown. Angle the leaf cap toward the ear side that looks lighter after pinning.
- Bury all yarn tails through the head or body, never into an ear. Chenille tails left in thin parts can show through after handling.
- Steam is not required; hand-shape the ears, trunk, and cheeks instead. The piece is complete when it sits without rolling and the strawberry remains balanced.
7 Technical Tips
- Missed round starts: The trunk twists fast because chenille hides the join path. Mark every first stitch through R12 or the base will skew and the seam line will pull left.
- Soft neck collapse: A body stuffed loosely at the top will fold under the head seam. Pack the neck zone firmer than the belly, but stop when the stitches still close without white stuffing glare.
- Visible decrease gaps: Standard decreases leave slots on the forehead and body taper. Use invisible decrease anywhere the round is visible from the front, especially R12–R18 of the head.
- Late eye placement: Installing eyes after the head is fully closed distorts chenille and widens the face. Lock them in between R8 and R9 before the final two decrease stages.
- Velvet tension drift: Chenille loosens after short breaks if your grip changes. Recheck one 12-stitch round on a limb before repeating the second limb or the pair will not match in length.
- Bad ear pinning: Ears placed too high flatten the silhouette and turn the elephant into a mouse shape. Pin the top edge around the upper side of the head and test both front and side views before sewing.
- Weak tail weaving: Short buried tails can slip out of chenille with handling. Run each tail through at least 4 cm of stuffing path, reverse direction once, and trim only after tension settles.
Conclusion
This build converts the usual safari format into a pink chenille version with deeper ear bowls, a separate trunk, raised cheeks, and a strawberry crown. Next, make one sample exactly as written, then adjust only the eye spacing or ear fold depth after you see the front view in real scale. Pin the finished front shot to Pinterest and post the side profile on Instagram so the trunk angle reads clearly. That gives the elephant amigurumi crochet pattern a better chance of being saved and remade accurately. Use the project tag #PinkStrawberryElephant. Did you place the strawberry centered on the crown, or tip it over one ear?









