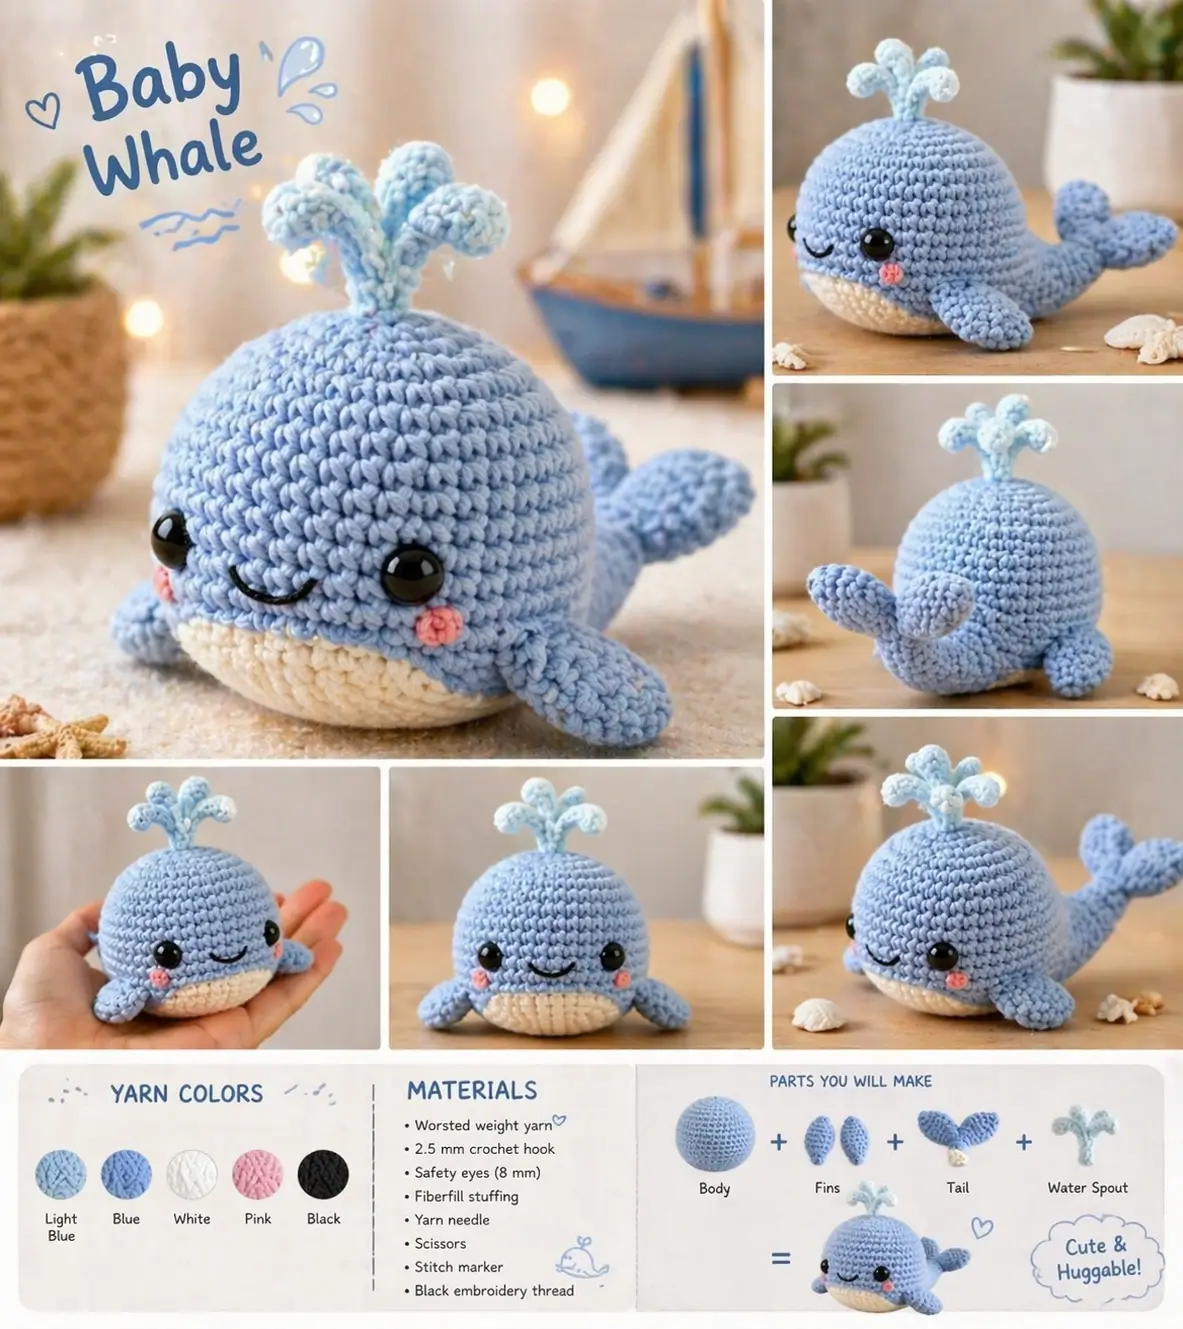
A whale loses its silhouette the moment the tail forks too flat. This baby whale amigurumi crochet pattern uses tight cotton, an 8 mm eye benchmark, and a 2.5 mm hook to build a palm-sized toy at about 7 cm long. You make it as a compact nursery piece or bag charm. The whale stays in advanced-beginner range because the shaping is small, not structurally difficult.
The Design: What Makes This Whale Different
The first structural choice is a domed upper shell and a shallower lower shell. You are shaping the side profile before the face goes in; once assembled, the whale reads round and forward-heavy instead of fish-like. A second choice is the separate belly panel. That keeps the pale underside crisp. Third comes the forked tail and short fins. They need clear spacing so the rear line lifts while the body still sits low. The common failure with a mini whale amigurumi is placing the fins too low or too far back. Then the crochet whale plush starts to look like a torpedo with cheeks. This version keeps the small scale but adds the visible spout and blush patches.
Project Info at a Glance
| Skill Level | Time | Finished Size | Hook | Best For |
|---|---|---|---|---|
| Advanced beginner | 1 day | Approx. 7 cm long | 2.5 mm | Mobile, shelf décor, charm scale |
Small whale patterns in this scale usually stay close to a compact cotton build. This version uses a 36-stitch dome so the profile stays whale-like instead of spherical.
Materials and Tools
Yarn
- Light blue — DK-light / light worsted cotton — 15 g benchmark — Scheepjes Stone Washed 805 Blue Apatite or similar cotton
- White — DK-light / light worsted cotton — 10 g benchmark — DMC Happy Cotton #761 or similar
- Pink — same weight cotton scrap — under 1 g — any blush-toned scrap close to the photo
- Black — embroidery thread scrap — trace amount — mouth only
Tools
- Hook 2.5 mm
- 8 mm safety eyes
- Polyester stuffing
- Yarn needle
- Stitch markers
- Scissors
Abbreviations
- MR = magic ring
- sc = single crochet
- inc = increase
- dec = decrease
- sl st = slip stitch
- ch = chain
- BLO = back loop only
- FLO = front loop only
- hdc = half double crochet
- dc = double crochet
Use invisible decrease on all stuffed sections so the decrease columns stay tighter and stuffing does not show through the body wall.
Construction Notes
The written pattern below is a photo-matched editorial draft built from standard amigurumi math. The split-shell approach gives the toy a fuller forehead, a flatter sitting base, and a cleaner break for the white belly patch. A whale can carry a very round face and still look correct, but only if the lower edge stays quiet and the tail exits from behind the widest point rather than under it. The 36-stitch plateau is used on the upper shell because that is the smallest count that still leaves room for 8 mm eyes, cheek patches, and a short embroidered smile without crowding the face.
Pattern — Step by Step
Continuous spiral unless noted.
Head (Make 1)
Yarn: light blue — Standard amigurumi math matched to photo.
R1: 6 sc in MR (6)
R2: inc ×6 (12)
R3: (1 sc, inc) ×6 (18)
R4: (2 sc, inc) ×6 (24)
R5: (3 sc, inc) ×6 (30)
R6: (4 sc, inc) ×6 (36)
R7: sc around (36)
R8: sc around (36)
R9: sc around (36)
R10: sc around (36)
R11: sc around (36)
R12: (4 sc, dec) ×6 (30)
R13: (3 sc, dec) ×6 (24)
Place the safety eyes between R8 and R9, 8 stitches apart. Add light stuffing now so the eye washers sit flat.
R14: (2 sc, dec) ×6 (18)
R15: (1 sc, dec) ×6 (12)
R16: dec ×6 (6)
Fasten off. Weave through the front loops of the final 6 stitches and pull closed. Leave a 25 cm tail.
Body (Make 1)
Yarn: light blue — Standard amigurumi math matched to photo.
R1: 6 sc in MR (6)
R2: inc ×6 (12)
R3: (1 sc, inc) ×6 (18)
R4: (2 sc, inc) ×6 (24)
R5: (3 sc, inc) ×6 (30)
R6: (4 sc, inc) ×6 (36)
R7: sc around (36)
R8: (4 sc, dec) ×6 (30)
R9: (3 sc, dec) ×6 (24)
R10: (2 sc, dec) ×6 (18)
R11: (1 sc, dec) ×6 (12)
Stuff this piece firmer than the head. It should resist finger pressure slightly so the finished whale sits low.
R12: dec ×6 (6)
Fasten off. Pull closed. Leave a 25 cm tail.
Belly Panel (Make 1)
Yarn: white — Standard amigurumi math matched to photo.
R1: 6 sc in MR (6)
R2: inc ×6 (12)
R3: (1 sc, inc) ×6 (18)
R4: (2 sc, inc) ×6 (24)
R5: (3 sc, inc) ×6 (30)
Fasten off. Leave a 35 cm tail. Do not stuff.
Side Fins (Make 2)
Yarn: light blue — Standard amigurumi math matched to photo.
R1: 6 sc in MR (6)
R2: inc ×6 (12)
R3: sc around (12)
R4: dec ×6 (6)
Do not stuff. Flatten the piece so the decrease edge becomes the inner attachment edge.
Fasten off. Leave a 20 cm tail.
Tail Lobes (Make 2)
Yarn: light blue — Standard amigurumi math matched to photo.
R1: 6 sc in MR (6)
R2: inc ×6 (12)
R3: sc around (12)
R4: dec ×6 (6)
Do not stuff. Flatten both lobes before joining them side by side.
Fasten off. Leave a 20 cm tail on each.
Water Spout (Make 1)
Yarn: light blue — Standard amigurumi math, worked as shaped loops rather than a stuffed piece.
R1: 6 sc in MR (6)
R2: (sl st in next st, ch 4, sl st in 2nd ch from hook, sc in next 2 ch, sl st back into same base st) ×3, sl st in next 3 sts around
This creates three soft spray loops. Pull the center tight before sewing so the stems sit together.
Fasten off. Leave a 15 cm tail.
Cheek Patches (Make 2)
Yarn: pink — Standard amigurumi math matched to the flat blush circles in the photo.
R1: 6 sc in MR (6)
R2: inc ×6 (12)
Fasten off. Leave a 10 cm tail. Flatten.
Assembly
- Pin the head to the body with the head shifted one stitch forward of center. That slight offset keeps the face dominant when the whale is viewed from the side.
- Sew the head to the body using the long tails and small whip stitches through outer loops only. Compress the body vertically by about 0.5–1 cm while sewing so the lower half becomes a sitting base, not a second full sphere.
- Position the belly panel on the lower front half. The top edge should land about two rounds below the eye line and stop before the back third of the whale.
- Sew the belly panel down evenly, stretching it slightly at the center and not at the edges. That keeps the white section broad at the front and narrow toward the sides.
- Embroider the smile with black thread centered between the eyes, about one round below them. Keep the mouth to roughly five stitches wide so it does not overpower the cheek circles.
- Sew the cheek patches one stitch below and slightly outside each eye. They should sit closer to the mouth than to the fins.
- Attach the side fins at the body join line, angled down and slightly forward. Their front tips should sit about two stitches behind the eye line.
- Join the two tail lobes together along one flat side of each piece. Sew the combined tail to the back center with the fork angled upward, not straight out.
- Stitch the water spout to the crown center. Turn one spray loop forward and the other two slightly outward so the top view reads as a three-part burst.
- Weave every remaining tail at least 4 cm into the stuffing core and reshape the whale by hand. The sample is complete when it sits without rolling and the tail clears the surface.
7 Technical Tips
- Stitch-marker drift changes the whole face. If the marker slips one stitch every other round, the eye line can end up 2–3 stitches off by R8.
- Stuffing firmness should differ between the two shells. Keep the head springy and the body firmer, or the whale will sit like a ball instead of leaning forward.
- Invisible decrease matters most on R12–R16 of the head. Standard decreases there open visible gaps, especially around 8 mm eye posts and dense cotton yarn.
- Eye placement timing cannot wait until the end. Insert the eyes between R8 and R9 before the last three decrease rounds or the face will pucker around the washers.
- Velvet substitution changes the scale fast. If you switch from cotton to velvet, drop the hook size and expect the whale to grow beyond the 7 cm benchmark even with the same counts.
- Pinning order controls the silhouette more than the embroidery does. Pin the tail first, then the fins, then the belly panel, because a low tail line makes the whale read like a fish immediately.
- Tail weaving needs depth. Run each tail end at least 4 cm through the stuffing core, reverse once, and trim only after tension holds, or the back fork can twist loose with handling.
Conclusion
Work the sample once in the listed cotton before changing yarn weight. That first pass gives you a repeatable reference for eye spacing, fin angle, and tail height, which matter more on a whale than on most round amigurumi. After finishing, post one front view and one side view to Pinterest and Instagram so the silhouette and belly line are visible. Use the tag #BabyWhalePattern. If you make this baby whale amigurumi crochet pattern, note your eye spacing and hook choice for the next version. Did you angle the tail upward enough to keep the whale from reading like a fish when viewed from the side?









