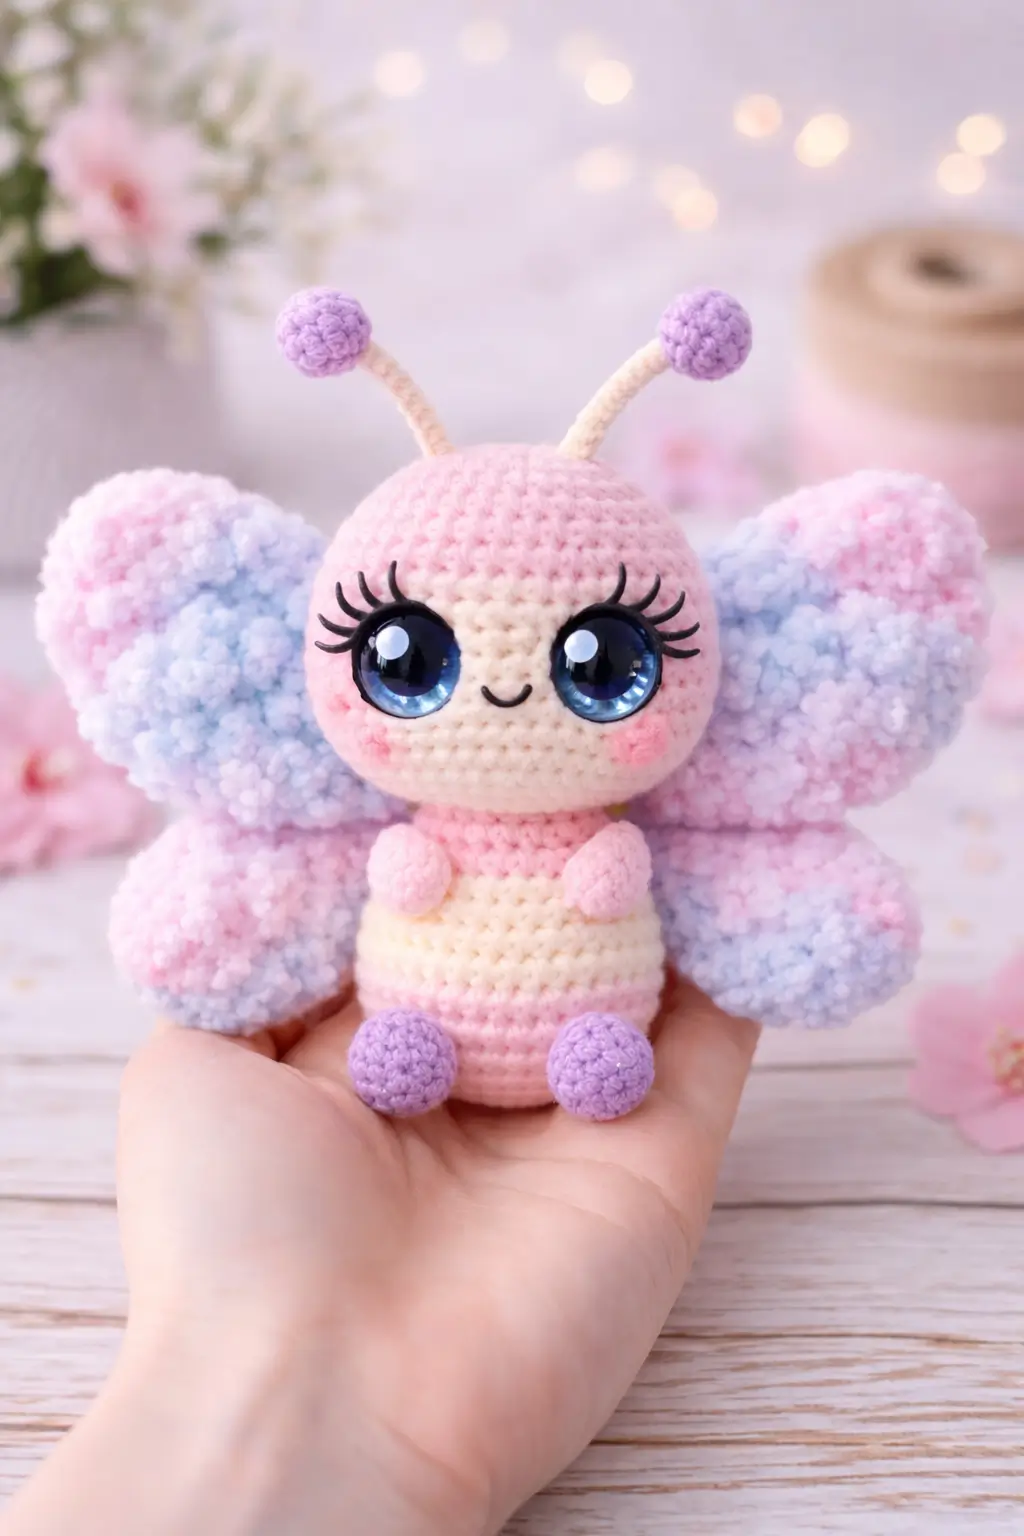
A butterfly fails fast when the upper wings read too small. This butterfly amigurumi crochet pattern fixes that first, then builds the face, body stripes, and antennae around a 16 cm pastel plush worked in DK yarn with a 3.0 mm hook and 12 mm eyes. It suits an intermediate maker. The result works well as nursery shelf decor or a spring gift.
The Design: What Makes This Butterfly Different
This butterfly uses three structural choices that matter. First, the upper wings sit larger and slightly higher than the lower pair. That reads as butterfly anatomy before color does.
Second, the face is divided from the head with a stitched cream patch. That keeps the eyes grouped on a lighter field, which makes a kawaii butterfly amigurumi look cleaner on camera and more legible at small scale. Third, the abdomen is striped but compact. The body stays short so the wings remain dominant rather than decorative extras.
The common failure is proportion drift. A maker increases the body height, then the wings look undersized and the antennae read like afterthoughts. In most butterfly crochet plush pattern tutorials, the body is either flat or too tall for the wingspan. Here, the wing mass leads, the body supports, and the accessories stay small.
Project Info at a Glance
| Skill Level | Time | Finished Size | Hook | Best For |
|---|---|---|---|---|
| Intermediate | 6–8 hours | 16 cm tall | 3.0 mm | Shelf decor, baby room styling, gift plush |
Materials and Tools
Yarn
- Pink — DK cotton/acrylic blend — 30–35 g — YarnArt Jeans or similar light yarn
- Cream — DK cotton/acrylic blend — 8–12 g — YarnArt Jeans or similar
- Lavender — DK cotton/acrylic blend — 15–20 g — for wings, feet, antenna tops, collar
- White — DK cotton/acrylic blend — 5 g — flower petals
- Yellow — DK cotton/acrylic blend — 2 g — flower center
- Green — DK cotton/acrylic blend — 2 g — leaves
- Iridescent wing overlay — organza, tulle, or sequined fabric scrap if you want the same look as the photo
Tools
- Hook 3.0 mm
- 12 mm safety eyes
- Stuffing
- Yarn needle
- Stitch markers
- Black embroidery thread for lashes and smile
- Sewing pins
- Fabric glue or hand sewing needle for wing overlay
Abbreviations
MR / sc / inc / dec / sl st / ch / BLO / FO
Invisible decrease joins two stitches through the front loops, which reduces bulk and keeps the shaping line cleaner than a standard decrease.
Pattern — Step by Step
Continuous spiral unless noted.
Head (Make 1)
Yarn: pink
R1: 6 sc in MR (6)
R2: inc x6 (12)
R3: (sc, inc) x6 (18)
R4: (2 sc, inc) x6 (24)
R5: (3 sc, inc) x6 (30)
R6: (4 sc, inc) x6 (36)
R7-R12: sc around (36)
Insert safety eyes between R8 and R9, 8 sts apart. Stuff firmly.
R13: (4 sc, dec) x6 (30)
R14: (3 sc, dec) x6 (24)
R15: (2 sc, dec) x6 (18)
FO. Leave a 20 cm tail.
Face Patch (Make 1)
Yarn: cream
R1: 6 sc in MR (6)
R2: inc x6 (12)
R3: (sc, inc) x6 (18)
R4: (2 sc, inc) x6 (24)
R5: sc around (24)
FO. Leave a 25 cm tail.
Stitch centered to the lower front of the head before final assembly.
Body (Make 1)
Yarn: cream, pink, cream, pink stripes
R1: 6 sc in MR (6)
R2: inc x6 (12)
R3: (sc, inc) x6 (18)
R4: (2 sc, inc) x6 (24)
R5: (3 sc, inc) x6 (30)
R6-R8: sc around (30)
Change to cream
R9-R11: sc around (30)
Change to pink
R12-R13: sc around (30)
Change to cream
R14-R15: sc around (30)
R16: (3 sc, dec) x6 (24)
R17: sc around (24)
R18: (2 sc, dec) x6 (18)
Stuff firmly, especially the lower half so it sits level.
R19: (sc, dec) x6 (12)
R20: dec x6 (6)
FO. Leave a 20 cm tail.
Arms / Front Legs (Make 2)
Yarn: pink
R1: 6 sc in MR (6)
R2: sc around (6)
R3: (sc, inc) x3 (9)
R4-R5: sc around (9)
R6: (sc, dec) x3 (6)
Light stuffing only in the round end.
FO. Leave a 20 cm tail.
Back Legs / Feet (Make 2)
Yarn: lavender
R1: 6 sc in MR (6)
R2: inc x6 (12)
R3-R4: sc around (12)
R5: (sc, dec) x4 (8)
Stuff lightly.
FO. Leave a 20 cm tail.
Upper Wings (Make 2)
Yarn: lavender edging with optional organza overlay
R1: 6 sc in MR (6)
R2: inc x6 (12)
R3: (sc, inc) x6 (18)
R4: (2 sc, inc) x6 (24)
R5: (3 sc, inc) x6 (30)
R6: (4 sc, inc) x6 (36)
R7: (5 sc, inc) x6 (42)
R8-R10: sc around (42)
R11: (5 sc, dec) x6 (36)
R12: sc around (36)
Flatten slightly. Crochet 18 sc through both layers to close the straight edge.
FO. Leave a 30 cm tail.
Cut an organza insert slightly smaller than the wing if copying the photo. Attach after assembly.
Lower Wings (Make 2)
Yarn: lavender edging with optional organza overlay
R1: 6 sc in MR (6)
R2: inc x6 (12)
R3: (sc, inc) x6 (18)
R4: (2 sc, inc) x6 (24)
R5: (3 sc, inc) x6 (30)
R6-R7: sc around (30)
R8: (3 sc, dec) x6 (24)
R9: sc around (24)
Flatten. Crochet 12 sc through both layers to close the straight edge.
FO. Leave a 25 cm tail.
Antennae (Make 2)
Yarn: cream stem, lavender tip
Tip
R1: 6 sc in MR (6)
R2: inc x6 (12)
R3-R4: sc around (12)
R5: (sc, dec) x4 (8)
Stuff lightly.
R6: dec x4 (4)
Do not FO.
Stem
R7: ch 8, then sc back along chain from second ch from hook (7)
FO. Leave a 20 cm tail.
Neck Ruffle / Collar (Make 1)
Yarn: lavender
Ch 24.
Row 1: starting in second ch from hook, 3 sc in each ch across (69)
FO. Leave a 20 cm tail.
Wrap around the neck and stitch down slightly gathered.
Cheek Patches (Make 2)
Yarn: soft pink
R1: 6 sc in MR (6)
R2: inc x6 (12)
FO. Leave a 10 cm tail.
Daisy Flower (Make 1)
Yarn: yellow center, white petals
Center in yellow
R1: 6 sc in MR (6)
sl st to first sc
Change to white
Petals: (ch 3, 2 dc in next st, ch 3, sl st in same st) x6
FO. Leave a 20 cm tail.
Leaves (Make 2)
Yarn: green
Ch 5
Work back along chain: sl st, sc, hdc, sc
FO. Leave a 10 cm tail.
Assembly
- Sew the face patch to the lower half of the head.
- Embroider the smile centered under the eyes. Add lashes with black thread.
- Sew the head to the top center of the body. Check from the side that the head tilts only slightly forward.
- Attach the neck ruffle around the join line.
- Pin the upper wings to the back, with the top edge roughly level with the eye line. Sew securely.
- Pin the lower wings under the upper pair, overlapping slightly. Sew so the straight edges sit close to the body.
- Add the arms to the upper front body, just under the collar.
- Add the feet to the lower body front, spaced evenly so the plush can lean back without twisting.
- Sew the antennae to the top of the head. Add the daisy and leaves near the right antenna base.
- Stitch the cheek patches lightly or brush blush onto the cheeks. Add wing overlays last if using organza.
The piece is complete when the wings read wider than the body from the front.
7 Technical Tips
- Mark the first stitch of every round. Losing the round start by even one stitch shifts eye placement and throws the face off-center.
- Stuff the head firmly before the final decrease rounds. A soft head collapses behind large 12 mm eyes and makes the face patch wrinkle.
- Use invisible decreases on all visible shaping rounds. Standard decreases leave raised corners that show on pastel yarn.
- Install the eyes before the head closes below 24 stitches. After that point, the washer angle becomes awkward and can distort the eye spacing.
- Keep the wing edges one hook tension tighter than the body. Loose wing borders curl and make the upper pair droop.
- Pin all four wings before sewing any of them permanently. A 3–5 mm height mismatch between left and right upper wings is obvious in photos.
- Weave tails back through at least 4 cm of internal stitches. Short tail burying slips out fastest on antennae, arms, and flower leaves.
Conclusion
This butterfly amigurumi crochet pattern works because the wing hierarchy is fixed first, then the face, stripes, and accessories stay in proportion to that frame. The build sits in the hand-sized range seen across published butterfly projects, but the styling pushes closer to a display plush than a basic insect toy. Next step: make one sample in solid cotton first, then add organza wing inserts on the second pass. Share the finished piece on Pinterest and Instagram with #PastelButterflyPattern. One question remains: did you place the upper wings high enough that the lower pair still shows from the front?









