
A turtle plush fails at the shell line before it fails anywhere else. This flower turtle amigurumi crochet pattern uses super bulky plush yarn, a 4 mm hook, layered floral appliqués, and a medium 15 cm target size for an intermediate build that works well as nursery décor or a gift-table display piece.
The Design: What Makes This Turtle Different
This version is built around contrast. The head and limbs stay soft, rounded, and plain so the shell can carry nearly all of the visual weight. That decision keeps the face readable from a distance and prevents the flower work from making the turtle look top-heavy. The second structural choice is a medium shell plateau rather than a very broad one; the floral mass already adds width, so the base shape does not need to overspread. Third, the butterflies are kept flat with only a chained body ridge, which stops the appliqués from snagging during handling.
A common mistake on any crochet flower turtle pattern is stacking large motifs all the way to the shell edge. That hides the shell outline and weakens the turtle silhouette. On a hydrangea turtle crochet pattern or similar plush turtle amigurumi, the shell rim still needs a visible border.
Project Info at a Glance
| Skill Level | Time | Finished Size | Hook | Best For |
|---|---|---|---|---|
| Intermediate | 6–8 hours | 15 cm | 4 mm | Display plush, gift, nursery shelf |
Finished size and hook reflect verified flower-turtle references; total time is a practical estimate for a custom shell with many appliqués.
Materials and Tools
Yarn
- Cream — super bulky chenille/velvet — 45 g — Premier Parfait Chunky or similar
- Lavender — lighter cotton/acrylic for appliqués — 20 g — DK or light worsted
- Lilac — lighter cotton/acrylic for appliqués — 15 g — DK or light worsted
- Soft purple — lighter cotton/acrylic for appliqués — 10 g — DK or light worsted
- Sage green — lighter cotton/acrylic for leaves — 10 g — DK or light worsted
- Blush pink — soft accent for cheek circles — 5 g
- Pearl white — optional for bead-securing thread — small amount
Tools
- Hook 4 mm for plush body
- Hook 2.5–3 mm for flowers, butterflies, and leaves
- Safety eyes 20 mm or 25 mm
- Stuffing
- Tapestry needle
- Stitch markers
- Pearl beads, 6–10 mm, optional
Hook, yarn weight, and plush-eye range align with current flower-turtle reference patterns; the second smaller hook is a drafting choice to keep appliqués crisp on a plush base.
Abbreviations
MR / sc / inc / dec / sl st / ch / BLO / FLO / hdc / dc / tr
Use invisible decrease in all visible shaping rounds. It reduces the ridge that standard dec leaves on plush yarn and keeps the face cleaner.
Pattern — Step by Step
Continuous spiral unless noted.
Plateau used here: Medium = 36 sts.
Body yarn: cream plush.
Appliqué yarn: lavender family + sage green.
Source note: main proportions are original to this article; where not otherwise cited, shaping follows standard amigurumi math.
Head (Make 1)
Yarn: cream — Source: Standard amigurumi math, sized to match a 15 cm medium turtle body
- R1: 6 sc in MR (6)
- R2: inc x6 (12)
- R3: (1 sc, inc) x6 (18)
- R4: (2 sc, inc) x6 (24)
- R5: (3 sc, inc) x6 (30)
- R6: (4 sc, inc) x6 (36)
- R7-R12: sc around (36)
- R13: (4 sc, dec) x6 (30)
- R14: (3 sc, dec) x6 (24)
Insert safety eyes between R9 and R10, spaced 8 sts apart. Add cheek patches later.
- R15: (2 sc, dec) x6 (18)
- Stuff firmly.
- R16: (1 sc, dec) x6 (12)
- R17: dec x6 (6)
Embroider a shallow smile centered one round below the eyes.
Fasten off. Leave 20 cm tail.
Body Base (Make 1)
Yarn: cream — Source: Standard amigurumi math
- R1: 6 sc in MR (6)
- R2: inc x6 (12)
- R3: (1 sc, inc) x6 (18)
- R4: (2 sc, inc) x6 (24)
- R5: (3 sc, inc) x6 (30)
- R6: (4 sc, inc) x6 (36)
- R7-R10: sc around (36)
- R11: (4 sc, dec) x6 (30)
- R12: (3 sc, dec) x6 (24)
- Start stuffing.
- R13: (2 sc, dec) x6 (18)
- R14: (1 sc, dec) x6 (12)
Fasten off. Leave 25 cm tail.
Shell Top (Make 1)
Yarn: lavender base under appliqués — Source: Standard amigurumi math
- R1: 6 sc in MR (6)
- R2: inc x6 (12)
- R3: (1 sc, inc) x6 (18)
- R4: (2 sc, inc) x6 (24)
- R5: (3 sc, inc) x6 (30)
- R6: (4 sc, inc) x6 (36)
- R7: BLO sc around (36)
- R8: sc around (36)
- R9: (5 sc, inc) x6 (42)
Fasten off. Leave 25 cm tail.
Shell Underside (Make 1)
Yarn: cream — Source: Standard amigurumi math
- R1: 6 sc in MR (6)
- R2: inc x6 (12)
- R3: (1 sc, inc) x6 (18)
- R4: (2 sc, inc) x6 (24)
- R5: (3 sc, inc) x6 (30)
- R6: (4 sc, inc) x6 (36)
- R7: sc around (36)
- R8: sc around (36)
Fasten off. Leave 25 cm tail.
Shell Ruffle (Make 1, worked onto Shell Top front loops of R7)
Yarn: lilac — Source: Original edging drafted for photo style
- Join yarn in any front loop of R7.
- Round: (sl st, 2 dc, sl st) in next 2 loops, sl st in next loop repeat around.
Fasten off. Weave in.
Front Legs (Make 2)
Yarn: cream — Source: Standard amigurumi math
- R1: 6 sc in MR (6)
- R2: inc x6 (12)
- R3-R4: sc around (12)
- R5: (4 sc, dec) x2 (10)
- R6-R7: sc around (10)
Flatten slightly. Light stuffing only at the base.
Fasten off. Leave 18 cm tail.
Back Legs (Make 2)
Yarn: cream — Source: Standard amigurumi math
- R1: 6 sc in MR (6)
- R2: inc x6 (12)
- R3: sc around (12)
- R4: (4 sc, dec) x2 (10)
- R5-R6: sc around (10)
Back legs should read shorter and wider than front legs.
Fasten off. Leave 18 cm tail.
Tail (Make 1)
Yarn: cream — Source: Tail method adapted from verified flower-turtle tail approach
- R1: 4 sc in MR (4)
- R2: sc around (4)
- R3: (1 sc, inc) x2 (6)
Fasten off. Leave 12 cm tail.
Cheek Patches (Make 2)
Yarn: blush pink — Source: Original flat appliqué
- R1: 6 sc in MR (6)
- R2: inc x6 (12)
Fasten off. Leave 10 cm tail.
Small Five-Petal Flowers (Make 8)
Yarn: lavender or lilac — Source: Original appliqué
- R1: 5 sc in MR (5)
- Join with sl st.
- Petals: (ch 2, 2 dc, ch 2, sl st) in next st x5
Fasten off. Leave 12 cm tail.
Medium Five-Petal Flowers (Make 5)
Yarn: lavender — Source: Original appliqué
- R1: 5 sc in MR (5)
- Join with sl st.
- Petals: (ch 2, 1 hdc, 2 dc, 1 hdc, ch 2, sl st) in next st x5
Fasten off. Leave 12 cm tail.
Large Layered Flowers (Make 3)
Yarn: soft purple + lavender — Source: Original appliqué
- Base R1: 6 sc in MR (6)
- R2: inc x6 (12)
- Join with sl st.
- First layer: (sl st, ch 2, 2 dc, ch 2, sl st) in every 2 sts x6 petals
- Second layer: working behind first layer, join contrast yarn and repeat the same petal sequence in skipped backs of petal joins to form offset petals.
Fasten off. Leave 15 cm tail.
Leaves (Make 16)
Yarn: sage green — Source: Original appliqué
- Ch 7.
- Work back along chain: sl st in 2nd ch from hook, sc, hdc, dc, hdc, sc.
- Turn to opposite side of foundation chain and work: sc, hdc, dc, hdc, sc.
- Sl st to tip.
Fasten off. Leave 8 cm tail.
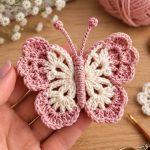
Butterflies (Make 4)
Yarn: lavender — Source: Original appliqué inspired by photo styling
- Ch 8.
- In 4th ch from hook: 3 dc, ch 2, sl st.
- In next ch: 3 hdc, ch 2, sl st.
- Ch 3 to form body center.
- Rotate and work opposite side of foundation:
- In next ch: 3 hdc, ch 2, sl st.
- In last ch: 3 dc, ch 2, sl st.
- Wrap tail around center 3 times.
Fasten off. Leave 15 cm tail.
Pearl Berry Clusters (Make 6, optional)
Yarn: pearl white sewing thread — Source: Photo-inspired accessory
- Thread 3 pearl beads onto a doubled strand.
- Anchor into shell top with one central stitch.
- Knot on wrong side.
Face Embroidery (Make 1 set)
Yarn: black + cream — Source: Original finishing
- Embroider curved smile centered between cheeks.
- Add one white highlight stitch at outer top corner of each eye if not using printed eyes.
Floral Shell Layout
Yarn: mixed appliqués — Source: Original composition for this article
- Place 3 large flowers first: top center, upper-left dome, lower-right dome.
- Fill between them with 5 medium flowers.
- Insert 8 small flowers in remaining gaps.
- Tuck leaves in pairs under flower edges.
- Add butterflies last, never directly on the shell rim.
Assembly
- Sew the head to the front of the body base, slightly angled upward.
- Attach the front legs to the lower front sides of the body.
- Attach the back legs slightly wider apart at the rear half.
- Sew the tail centered at the back.
- Sew the shell underside to the body top, stuffing and shaping as you close.
- Place the shell top over the underside and stitch around, keeping the ruffle free at the edge.
- Attach the cheek patches below the eyes, then embroider the smile.
- Sew the large, medium, and small flowers to the shell, starting from center outward.
- Add the leaves, then stitch the butterflies across shell high points and one front leg.
- Add pearl clusters only after all yarn tails are woven and the shell curve is fixed.
The completed turtle should sit flat on all four legs with the shell mass centered over the body.
7 Technical Tips
- Mark the shell center before sewing flowers. Drift of even 1 cm makes the dome look lopsided once the butterflies go on.
- Do not overstuff the head. A hard-packed head pushes the eyes outward and flattens the smile line.
- Use invisible decreases on the head only. Standard dec is less noticeable under the shell but shows immediately on the face.
- Install eyes before the final third of head shaping. On plush yarn, forcing washers in late can split fibers around the eye posts.
- Keep appliqué yarn one weight lighter than the body yarn. Matching plush to plush makes the flowers blur into the shell surface.
- Pin every butterfly in three spots before sewing. One center pin is not enough; wings twist and lose symmetry.
- Weave tails inward across at least 3 directional changes. A single straight pass works loose under the shell because the turtle gets handled from the top.
Conclusion
This flower turtle amigurumi crochet pattern works because the shell is treated as a layered surface, not just a color block. Build the body first, lock the shell silhouette, then add flowers from large to small so the dome stays readable. Post the finished turtle on Pinterest and Instagram with one overhead shell shot and one face-level shot. Use #FlowerTurtlePattern. The next practical step is to test the same base with fewer flowers and a denser leaf layout. Which matters more on your version: a wider shell ruffle, or a taller butterfly placement over the shoulder line?





Muchísimas gracias y bendiciones
O M GOSH!! This is AWESOME!! Thank you SO MUCH for the pattern…… I LOVE IT!!!
O M GOSH!! This is AWESOME!! Thank you SO MUCH for the pattern…… I LOVE IT!!! Actually NO I didn’t make that comment before…