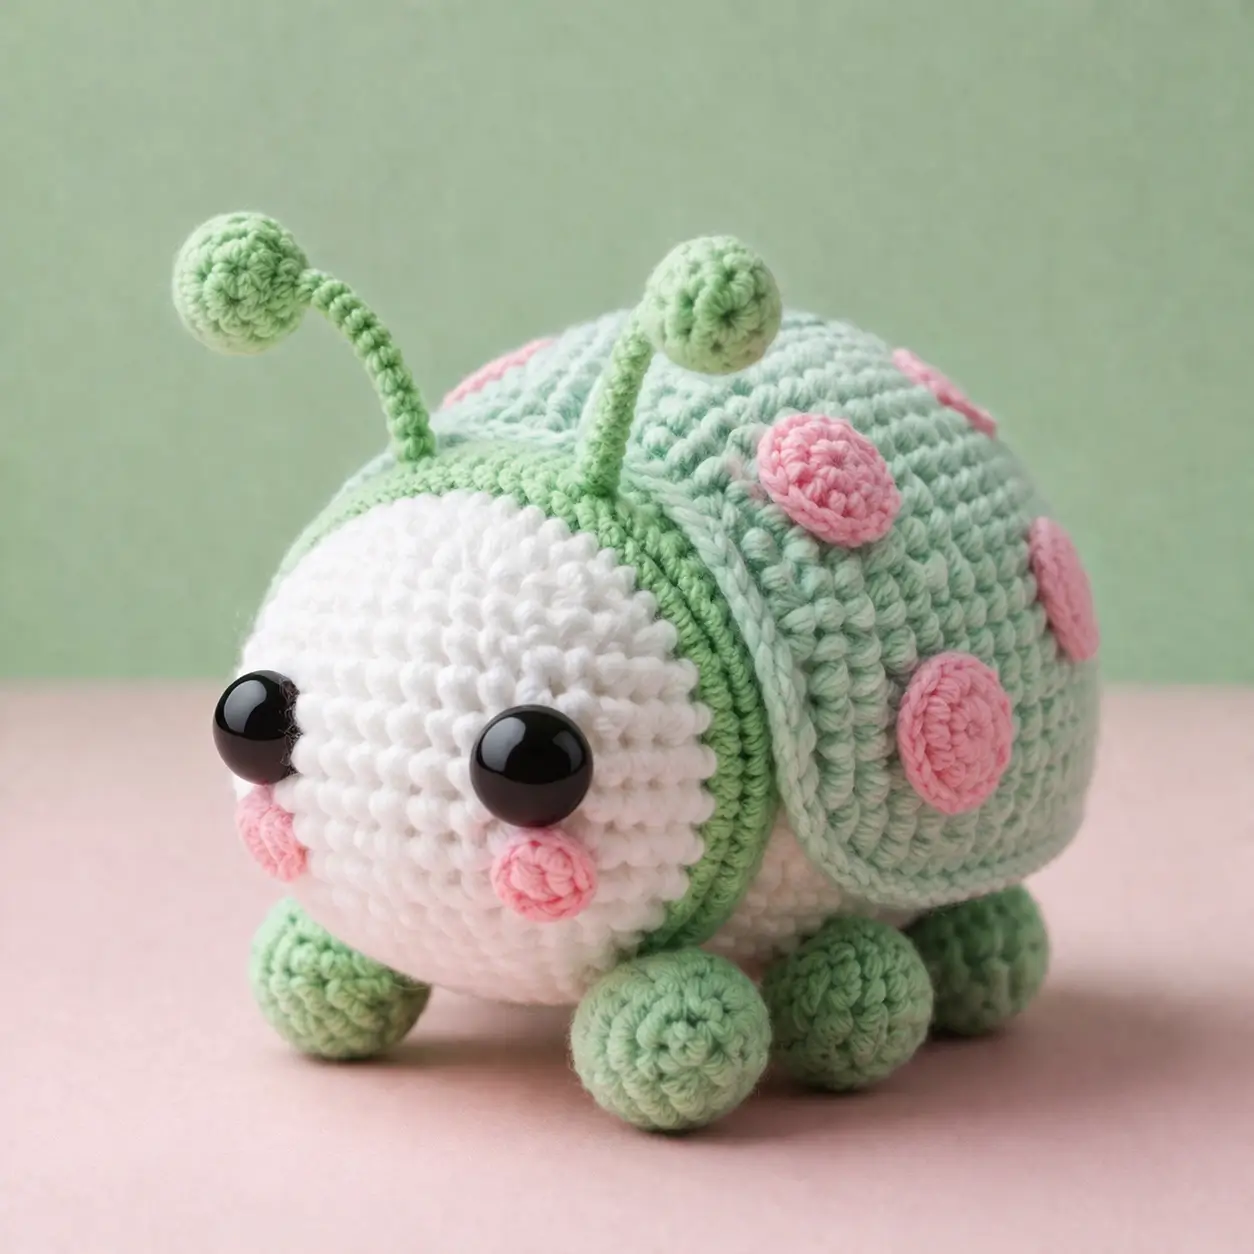
A caterpillar only looks correct when the head stays blunt and the back rises later, not at the nose. This caterpillar amigurumi crochet pattern uses DK yarn, a 3.25 mm hook, and 12 mm eyes for a compact pastel build at roughly 24 cm long. Skill level sits at easy to lower-intermediate. The shape works well as nursery decor because the side profile reads clearly from a shelf.
The Design: What Makes This Caterpillar Different
This photo shows a caterpillar built around contrast, not stripes. The white face is oversized, which pushes the eyes forward and keeps the expression readable even without a stitched mouth. Behind it sits a mint collar ridge that separates head from shell. That break matters. Without it, the piece starts to resemble a grub rather than a stylized caterpillar.
The second structural choice is the raised top panel. Instead of making the whole body one smooth tube, this version adds a dome-like shell flap with pink spots. That gives the toy a ladybug-adjacent silhouette while keeping the anatomy caterpillar-based. A common mistake with a crochet caterpillar pattern is overstuffing the front segment until the head matches the body diameter. Proportion collapses fast when that happens. In most caterpillar amigurumi builds, the head should read as round, but still visually separate from the thicker middle section.
Project Info at a Glance
| Skill Level | Time | Finished Size | Hook | Best For |
|---|---|---|---|---|
| Easy to lower-intermediate | 5–7 hours | 24 cm long / 12.5 cm high | 3.25 mm | Shelf plush, nursery decor, spring market stock |
Finished-size benchmark and hook range are based on published caterpillar patterns in DK/light worsted yarn.
Materials and Tools
Yarn
- White — DK / light worsted — 20 g — DMC Happy Cotton or similar cotton blend for the face/body front
- Mint green — DK / light worsted — 60 g — DMC Happy Cotton or similar for shell, collar, legs, antennae
- Soft pink — DK / light worsted — 20 g — matching cotton for shell spots and cheek patches
Tools
- Hook 3.25 mm
- 12 mm safety eyes
- Polyester stuffing
- Yarn needle
- Stitch markers
- Scissors
Abbreviations
MR = magic ring
sc = single crochet
inc = increase
dec = invisible decrease
sl st = slip stitch
ch = chain
BLO = back loop only
FLO = front loop only
Invisible decrease is used here to keep the face and shell taper smooth without opening visible gaps between stitches.
Pattern — Step by Step
Continuous spiral unless noted.
Head (Make 1)
Yarn: White — photo-based original shaping using standard amigurumi math
R1: 6 sc in MR (6)
R2: inc x6 (12)
R3: (sc, inc) x6 (18)
R4: (2 sc, inc) x6 (24)
R5: (3 sc, inc) x6 (30)
R6: (4 sc, inc) x6 (36)
R7–11: sc around (36)
Insert 12 mm eyes between R8 and R9 with 8 stitches between them.
R12: (4 sc, dec) x6 (30)
R13: (3 sc, dec) x6 (24)
Stuff firmly, but keep the lower face slightly flatter than the crown.
R14: sc around (24)
Fasten off. Leave a 25 cm tail.
Body Core (Make 1)
Yarn: White — photo-based original shaping using standard amigurumi math
R1: 6 sc in MR (6)
R2: inc x6 (12)
R3: (sc, inc) x6 (18)
R4: (2 sc, inc) x6 (24)
R5: (3 sc, inc) x6 (30)
R6: (4 sc, inc) x6 (36)
R7–10: sc around (36)
R11: (4 sc, dec) x6 (30)
R12: sc around (30)
R13: (3 sc, dec) x6 (24)
R14: sc around (24)
Stuff with medium firmness. Keep the underside flatter than the back.
R15: (2 sc, dec) x6 (18)
R16: (sc, dec) x6 (12)
R17: dec x6 (6)
Fasten off. Close opening. Weave in tail.
Collar Ridge (Make 1)
Yarn: Light green — photo-based original shaping
Ch 24. Join without twisting.
R1: sc around (24)
R2: BLO sc around (24)
R3: sc around (24)
Fasten off. Leave a 20 cm tail.
Shell Top Panel (Make 1)
Yarn: Mint green — photo-based original shaping using standard amigurumi math
R1: 6 sc in MR (6)
R2: inc x6 (12)
R3: (sc, inc) x6 (18)
R4: (2 sc, inc) x6 (24)
R5: (3 sc, inc) x6 (30)
R6: (4 sc, inc) x6 (36)
R7: (5 sc, inc) x6 (42)
R8–12: sc around (42)
R13: BLO sc around (42)
R14: sc around (42)
Fasten off. Leave a 35 cm tail.
Shell Side Flap Edge (Work onto Shell Panel)
Yarn: Mint green
Join yarn in FLO of R13.
R1: sc around in FLO (42)
R2: (5 sc, inc) x7 (49)
R3: sc around (49)
Fasten off. Leave a 20 cm tail.
Front Legs (Make 2)
Yarn: Mint green — standard amigurumi sphere
R1: 6 sc in MR (6)
R2: inc x6 (12)
R3–4: sc around (12)
R5: dec x6 (6)
Stuff firmly.
Fasten off. Leave a 20 cm tail.
Middle Legs (Make 2)
Yarn: Mint green — standard amigurumi sphere
R1: 6 sc in MR (6)
R2: inc x6 (12)
R3–4: sc around (12)
R5: dec x6 (6)
Fasten off. Leave a 20 cm tail.
Back Legs (Make 2)
Yarn: Mint green — standard amigurumi sphere
R1: 6 sc in MR (6)
R2: inc x6 (12)
R3–4: sc around (12)
R5: dec x6 (6)
Fasten off. Leave a 20 cm tail.
Antennae Stems (Make 2)
Yarn: Light green — inspired by published caterpillar antenna options with custom round math
R1: 6 sc in MR (6)
R2–7: sc around (6)
Do not stuff. Fasten off. Leave a 20 cm tail.
Antenna Tips (Make 2)
Yarn: Light green — standard amigurumi sphere
R1: 6 sc in MR (6)
R2: inc x6 (12)
R3: sc around (12)
R4: dec x6 (6)
Stuff lightly. Fasten off. Leave a 15 cm tail.
Cheek Patches (Make 2)
Yarn: Soft pink — flat circle
R1: 6 sc in MR (6)
R2: inc x6 (12)
Fasten off. Leave a 15 cm tail.
Shell Spots (Make 4)
Yarn: Soft pink — flat oval/circle accents
R1: 6 sc in MR (6)
R2: inc x6 (12)
R3: sc around (12)
Fasten off. Leave a 15 cm tail.
Assembly
- Sew the head to the front of the body core, keeping the lower edge of the head slightly tucked under so the face points forward rather than down.
- Wrap the collar ridge around the seam between head and body. Sew it in place with the BLO ridge visible.
- Pin the shell top panel on the upper body so it starts just behind the collar and ends before the body taper.
- Sew the shell panel down along both lower sides only, leaving the dome lifted at the center back.
- Attach the front legs under the head/body join, spaced so the toy sits level.
- Sew the middle legs directly under the widest point of the shell.
- Attach the back legs under the rear taper, keeping both sides symmetrical.
- Sew the antennae stems to the crown of the head about 6 stitches apart, then attach one antenna tip to each stem.
- Stitch the cheek patches one round below and slightly outside each eye. Add the shell spots across the mint dome with one centered high and three staggered around the sides.
- Check balance on a flat surface, add small amounts of stuffing through a seam if needed, then weave in all remaining tails.
The completed toy should stand on six legs with the shell dome higher than the head.
7 Technical Tips
- Mark the shell centerline before sewing. A shifted shell panel by even 2 stitches makes the pink spots look off-axis in side view.
- Keep head stuffing firmer than body stuffing. A soft head collapses around 12 mm eyes and widens the face beyond the collar.
- Use invisible decreases on all visible tapers. Standard decreases on the face create a broken texture line under the eyes.
- Install the eyes before the final head taper. For this scale, placing them after round 11 is already late and reduces washer access.
- Do not overstuff the shell flap. The top panel needs loft from structure, not fill, or the side flap will flare outward.
- Pin all six legs before sewing any of them permanently. A front-leg height difference of even 3 mm causes rocking on a shelf.
- Weave tails through at least 4 internal direction changes. Straight tail burying often works loose at the collar seam because that joint carries the most handling stress.
Conclusion
This caterpillar amigurumi crochet pattern works because the proportions are controlled: small head, raised mint shell, compact legs, and antennae that do not overpower the face. Published caterpillar patterns commonly fall around DK to worsted yarn, 3.25 to 3.5 mm hooks, and roughly 21 to 24 cm finished length, which makes this build sit inside an established size range while still matching the photo styling. Next step: make the body core first and test the shell width against it before sewing any spots. Share the result on Pinterest and Instagram with #PastelCaterpillarPattern. One question remains useful during finishing: did you place the antennae far enough apart to keep the face open?









