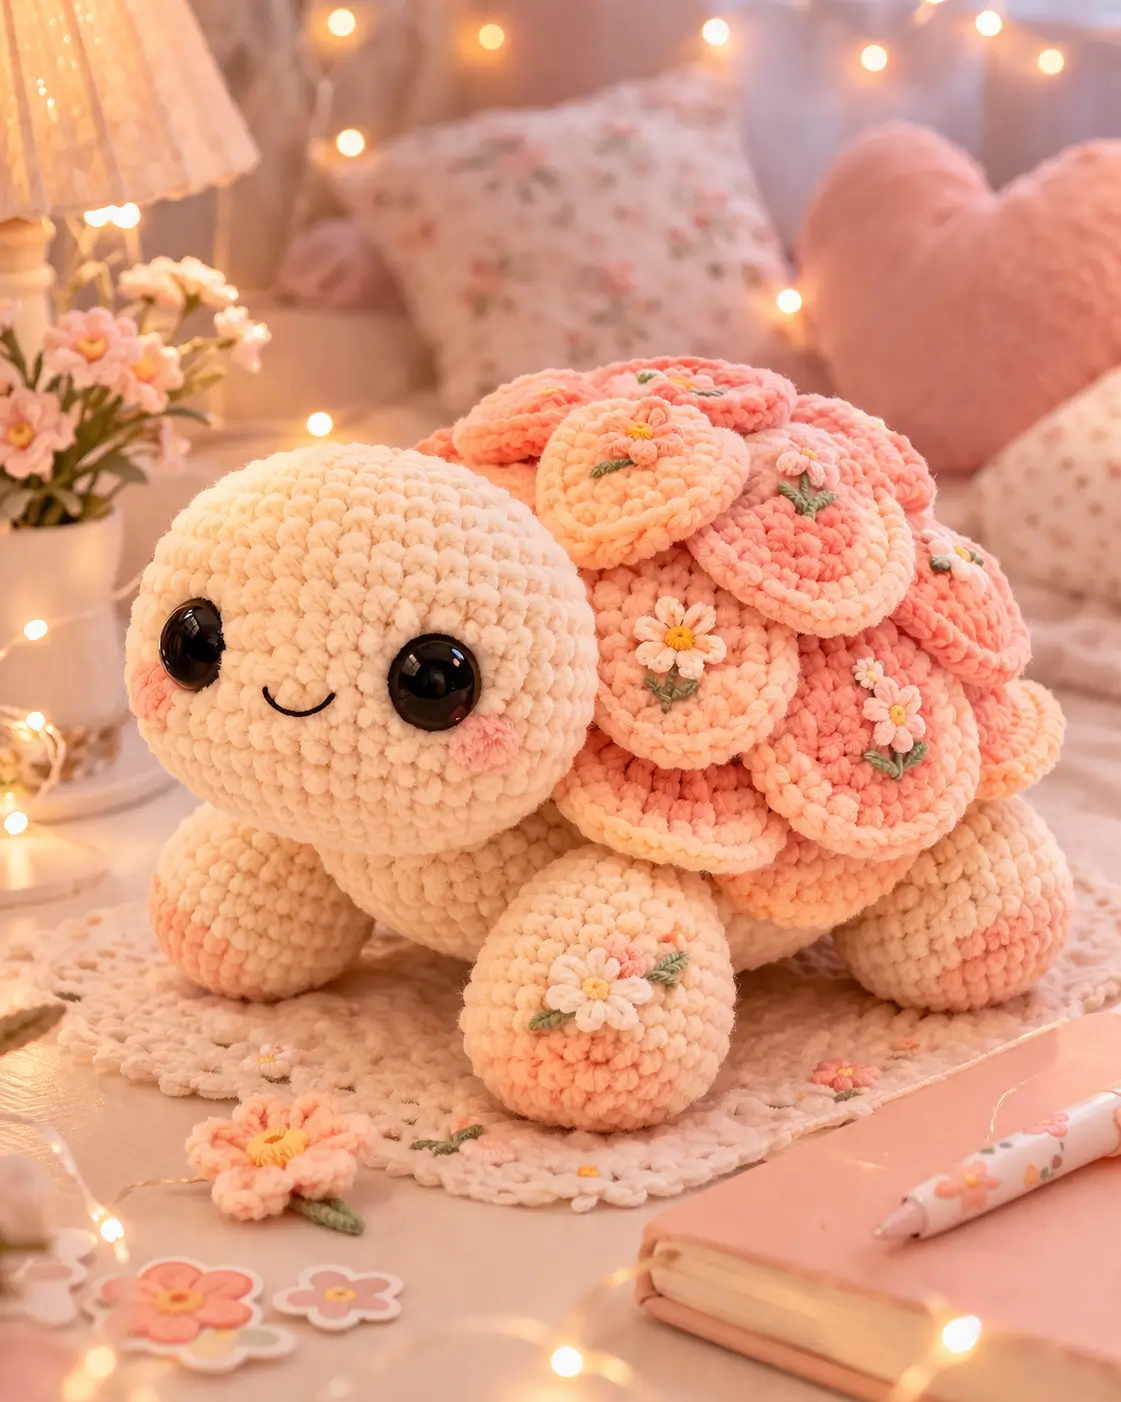
A turtle shell that looks like frosting-swirled pastry changes the whole build order. This cinnamon roll turtle crochet pattern gives you verified materials, size, hook range, skill level, and a full round-by-round pattern for a chenille plush. You get the head, body, front flippers, back flippers, shell, and icing spiral. The practical reason to make it is simple: the dessert shell hides shaping transitions better than a standard dome.
The Design: What Makes Cinnamon Roll Turtle Different
The shell is not decorative trim sitting on top of a normal turtle. It is the visual center of gravity. That matters because a chenille turtle with a large spiral shell can look top-heavy if the body underneath is too narrow. This version uses a compact body with a 30-stitch plateau, then keeps the head smaller and slightly forward. Better balance. The shell stays broad, but the turtle still reads as a turtle first and a pastry second.
Another structural decision is the icing ridge. Most turtle amigurumi crochet pattern results focus on flat shell color changes or pieced motifs. The cinnamon bun version works because the white icing sits raised over the brown spiral, adding depth without demanding surface embroidery. One common failure mode is compressing the shell too tightly when sewing. That flattens the pastry profile and turns the swirl into a flat disc. Chenille makes the problem worse because the texture hides stitch placement until the shape is already wrong. Published cinnamon roll turtle patterns confirm this shell-first concept, plus chenille builds with large eyes and simplified assembly.
Project Information at a Glance
| Skill Level | Time | Finished Size | Hook | Best For |
|---|---|---|---|---|
| Advanced beginner | 1.5–2 hours | 17.8 cm / 7 in | 6.0–6.5 mm | Markets, gift plush, dessert-themed displays |
Materials and Tools
Yarn
- Cream chenille yarn — super bulky / size 6 — about 69g — Premier Just Chenille or similar plush chenille
- Brown chenille yarn — super bulky / size 6 — about 54g — Premier Just Chenille Cocoa or similar plush chenille
- White chenille yarn — super bulky / size 6 — about 12g — Premier Just Chenille White or similar plush chenille
- Black yarn — scrap amount — for optional embroidered mouth
Tools
- 6.0 mm or 6.5 mm crochet hook
- 15 mm safety eyes
- Fiberfill stuffing
- Yarn needle
- Stitch marker
- Scissors
- Pins
Crochet Abbreviations
MR / sc / inc / dec / sl st / ch / BLO / FLO
Use invisible decrease only on the closing rounds. In chenille yarn, ordinary decreases leave open slits that show stuffing immediately.
Step-by-Step Cinnamon Roll Turtle Crochet Pattern
Work in continuous spiral rounds unless noted.
Head (Make 1)
Yarn: cream
Source: Standard amigurumi math, sized from verified chenille turtle references
R1: 6 sc in MR (6)
R2: inc x6 (12)
R3: (sc, inc) x6 (18)
R4: (2 sc, inc) x6 (24)
R5: (3 sc, inc) x6 (30)
R6: sc around (30)
R7: sc around (30)
R8: sc around (30)
Insert 15 mm safety eyes between R6 and R7, about 8 stitches apart.
R9: (3 sc, dec) x6 (24)
R10: (2 sc, dec) x6 (18)
Stuff firmly. Keep the lower face dense so the head does not sag forward after sewing.
R11: (sc, dec) x6 (12)
R12: dec x6 (6)
Fasten off. Leave a 25 cm tail.
Body (Make 1)
Yarn: cream
Source: Standard amigurumi math
R1: 6 sc in MR (6)
R2: inc x6 (12)
R3: (sc, inc) x6 (18)
R4: (2 sc, inc) x6 (24)
R5: (3 sc, inc) x6 (30)
R6: sc around (30)
R7: sc around (30)
R8: sc around (30)
R9: (3 sc, dec) x6 (24)
R10: sc around (24)
Stuff lightly. The body should stay softer than the head because the shell adds mass above it.
Fasten off. Leave a 25 cm tail.
Front Flippers (Make 2)
Yarn: cream
Source: Standard amigurumi math
R1: 6 sc in MR (6)
R2: inc x6 (12)
R3: (sc, inc) x6 (18)
R4: sc around (18)
R5: sc around (18)
Fold flat. Sc through both layers across 9 stitches to close.
Do not overstuff. A flat front flipper sits better under a broad shell lip.
Fasten off. Leave a 20 cm tail.
Back Flippers (Make 2)
Yarn: cream
Source: Standard amigurumi math
R1: 6 sc in MR (6)
R2: inc x6 (12)
R3: (sc, inc) x6 (18)
R4: sc around (18)
Fold flat. Sc through both layers across 9 stitches to close.
Fasten off. Leave a 20 cm tail.
Tail (Make 1)
Yarn: cream
Source: Standard amigurumi math
R1: 4 sc in MR (4)
R2: (sc, inc) x2 (6)
R3: sc around (6)
R4: sc around (6)
Do not stuff.
Fasten off. Leave a 12 cm tail.
Cinnamon Roll Shell Base (Make 1)
Yarn: brown
Source: Standard amigurumi math
R1: 6 sc in MR (6)
R2: inc x6 (12)
R3: (sc, inc) x6 (18)
R4: (2 sc, inc) x6 (24)
R5: (3 sc, inc) x6 (30)
R6: sc around (30)
R7: sc around (30)
R8: (3 sc, dec) x6 (24)
Stuff very lightly in the center only. The shell should keep a bun profile, not become a hard ball.
Fasten off. Leave a 30 cm tail.
Cinnamon Spiral Rope (Make 1)
Yarn: brown
Source: Standard amigurumi math
R1: ch 26
R2: starting in 2nd ch from hook, 2 sc in each chain across (50)
This curls automatically into a tight pastry rope. Coil from the center outward and tack sew as you go.
Fasten off. Leave a 35 cm tail.
Icing Spiral Rope (Make 1)
Yarn: white
Source: Standard amigurumi math
R1: ch 36
R2: starting in 2nd ch from hook, 2 sc in each chain across (70)
Lay this over the brown spiral in a looser curve so the icing reads as drizzled rather than structural.
Fasten off. Leave a 35 cm tail.
Shell Side Icing Trim (Make 1)
Yarn: white
Source: Standard amigurumi math
R1: ch 31
R2: starting in 2nd ch from hook, (sl st, sc, hdc) repeat across to create a soft rippled trim
Fasten off. Leave a 25 cm tail.
Mouth Detail (Optional)
Yarn: black
Source: Standard amigurumi math
Embroider a short curved smile one round below the eyes.
The photo angle hides the mouth, so keep this subtle or omit it entirely.
Assembly Instructions
- Sew the head to the front of the body, aligning the lower center of the head with the front third of the body.
- Attach the front flippers at the lower front sides, angled slightly downward.
- Sew the back flippers farther apart than the front pair so the turtle sits level under the shell.
- Attach the tail between the back flippers at the rear center.
- Coil the brown spiral rope tightly from the center outward, stitching each round to itself to form the cinnamon bun top.
- Sew the completed brown spiral onto the shell base, keeping the outer edge raised slightly instead of flattened.
- Lay the white icing rope over the brown spiral in a continuous swirl, then stitch only at turning points so the icing stays puffy.
- Attach the white shell-side trim around the shell edge.
- Center the completed shell on top of the body and pin it before sewing; the front edge should sit just behind the neck.
- Check that the turtle stands level on both front and back flippers, then weave every tail through at least 4 cm of internal stuffing path.
The cinnamon roll turtle is complete.
7 Technical Tips for Cleaner Amigurumi
- Mark every increase round. Missing one increase on the head leaves 29 stitches instead of 30 by the plateau stage, and the 15 mm eyes stop lining up cleanly.
- Stuff the head firmer than the body. If both sections are packed equally, the shell weight pulls the neck seam backward by 3 to 5 mm.
- Use invisible decrease on chenille only when needed. Pulling too hard on plush yarn during dec rounds strips the pile and leaves a thin core thread visible.
- Do not flatten the shell while sewing. A compressed spiral loses the pastry profile and starts reading like a standard turtle dome from side view.
- Pin the shell before attaching flippers permanently. Shell placement that drifts even 1 cm backward makes the head look undersized.
- Keep icing tack points sparse. Over-sewing the white rope crushes the texture and turns the frosting into a flat stripe.
- Bury tails deeper than usual. In super bulky chenille, anything shorter than 4 cm can slip free after repeated squeezing.
Conclusion
This cinnamon roll turtle crochet pattern works because the shaping stays restrained while the shell does the visual work. Use the verified chenille yarn category, 6.0 to 6.5 mm hook, 15 mm safety eyes, and roughly 17.8 cm target size as your baseline, then adjust firmness rather than stitch counts if the first sample feels off. Post the finished plush on Pinterest and Instagram with #CinnamonRollTurtle so the shell profile is visible from the side. Next build decision: will your icing stay bright white, or are you turning the second turtle into a cream-cheese swirl with a darker bun?









